Ultimate Tasty Chocolate Chip Caramel Cookies
Table of Contents
So, picture this. It’s my nephew’s birthday party, right? My sister, bless her, decided to go full Pinterest-mom and made these elaborate, five-tier cupcakes that looked like a unicorn threw up rainbows on them. They were gorgeous. And honestly? They tasted like sweetened cardboard with a side of fondant regret. The kids were picking off the sprinkles and leaving the rest. It was a scene.
And then my Aunt Margie, who has never followed a recipe to the letter in her life, pulls out this old, stained Tupperware container. Inside were these lumpy, not-particularly-pretty, deep brown cookies. She just goes, “Oh, I had some stuff to use up.” I took one, mostly to be polite. People, I almost dropped the plate. The cookie itself was this chewy, almost fudgy situation, and then you hit the center—this oozy, gooey, salty-sweet pocket of liquid caramel that just made your eyes roll back in your head. It was pure magic. My sister’s unicorn cupcakes were instantly forgotten. A hush fell over the room, followed by a gentle stampede toward Aunt Margie. My sister was not pleased. A playful, cookie-fueled feud was born that day.
I begged Aunt Margie for the recipe. She just waved a hand and said, “A little of this, a little of that.” So I spent the next six months, no joke, trying to reverse-engineer those darn cookies. There were batches that spread into one giant caramel-laced pancake on the sheet. Batches where the caramel hardened into a tooth-breaking lacquer. One infamous batch where I used that fancy, runny salted caramel sauce and it all just leaked out and burned into a black, smoky mess on the bottom of my oven. My kitchen smelled like a campfire for a week. My husband started calling them “The Tragedy Cookies.”
But then… I got it. The secret wasn’t fancy. It was patience, a specific type of chocolate, and understanding that the caramel needs to be trapped. And now, these chocolate caramel cookies are my not-so-secret weapon. They’re the thing I bring to gatherings when I want to be everyone’s favorite person. They look humble, but one bite tells you everything you need to know. This is the story of how you can make them, without the six months of trial and error and household smoke incidents.
Why You’ll Love This Recipe
Let’s be real, you’re not here because you want a dainty, polite cookie. You want a cookie that makes a statement. This is that cookie.
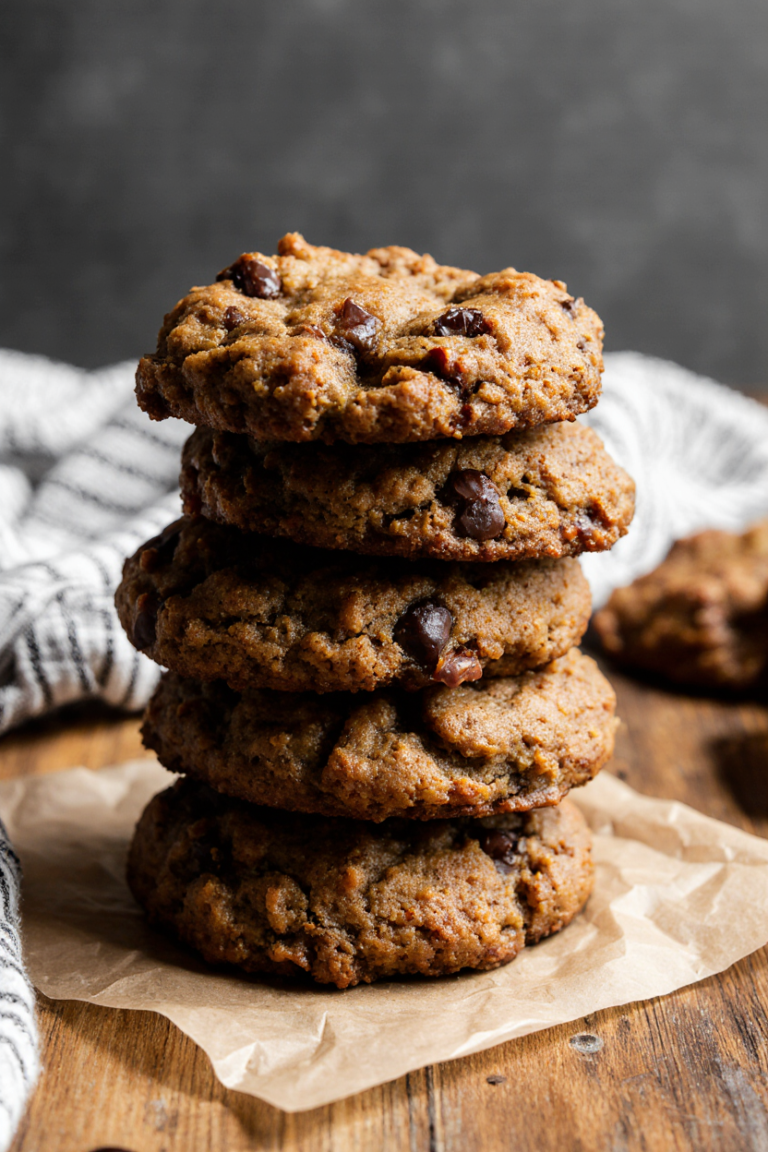
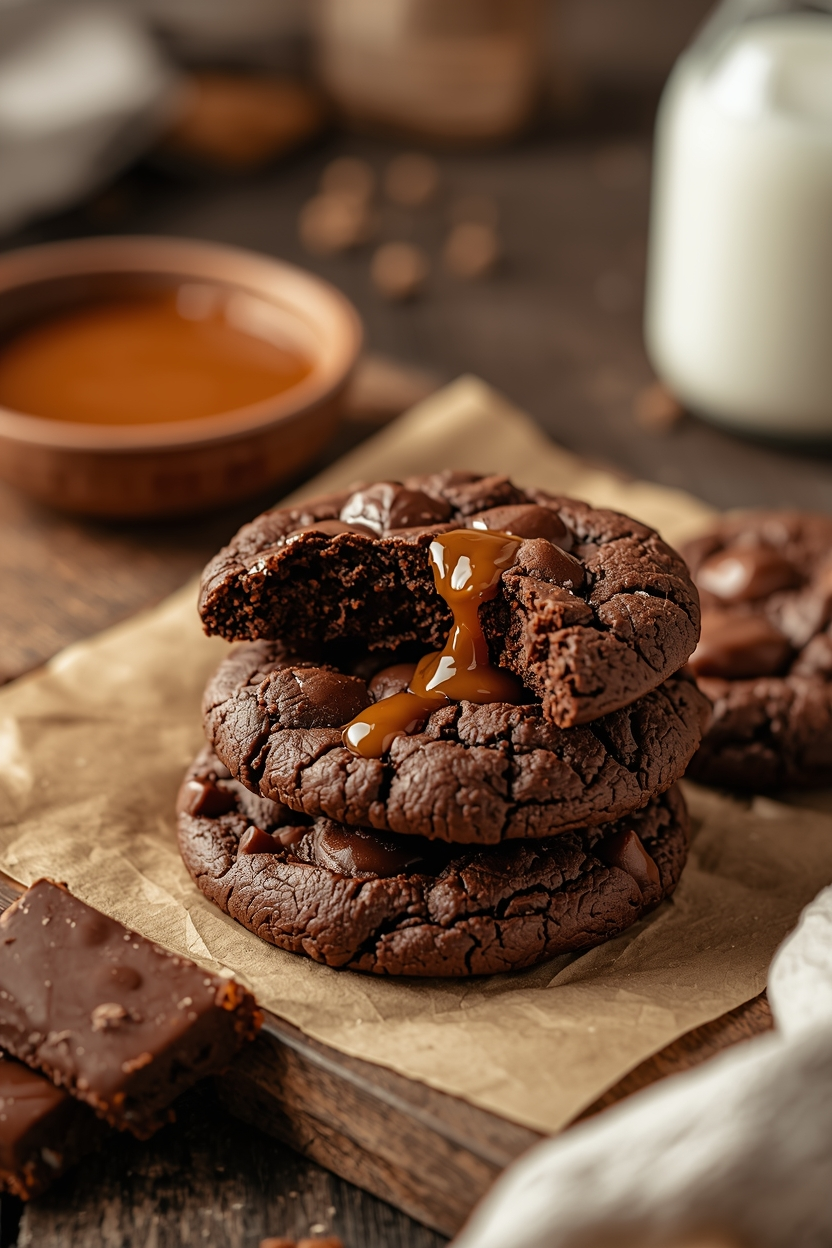
- It’s All About That Surprise Gooey Center. The outside is deceptively simple—a rich, dark, chewy chocolate cookie. But the magic is hidden inside. When you bite into the warm cookie, you’re rewarded with a river of melted, buttery caramel. It’s a textural party in your mouth, and everyone’s invited.
- Shockingly Simple to Make, Honestly. After all my disasters, I’ve refined this to be as foolproof as possible. No fancy equipment needed. If you can melt chocolate and butter together and scoop dough, you are 90% of the way there. The active work time is maybe 20 minutes. The hardest part is waiting for them to cool enough to eat without burning your tongue on molten caramel (a mistake I make Every. Single. Time.).
- Way More Affordable (and Tastier) Than Bakery Versions. Have you seen the price of gourmet stuffed cookies at coffee shops? It’s criminal. Making a batch of these at home costs a fraction, and I promise you, they taste a hundred times better because they’re fresh, warm, and made with real ingredients. You control the quality of the chocolate and the caramel.
- The Ultimate Comfort Food & Crowd-Pleaser. These cookies are a hug in dessert form. They’re perfect for a cozy movie night, for cheering up a friend (I’ve mailed them, carefully packaged), or for being the absolute star of the potluck. They appeal to basically every dessert lover out there.
- They Feel Fancy Without the Fuss. Serving these on a nice plate makes it look like you slaved away in a French patisserie. Only you and I will know the beautiful, beautiful truth: it’s a wonderfully simple dough wrapped around a store-bought cheat. I call that a win.
Let’s Talk Ingredients (The “Why” Behind the Magic)
This isn’t just a list. This is the roadmap to success. Using the right stuff here makes all the difference between a good cookie and a life-changing one.
- Semi-Sweet Chocolate Chips (1 1/2 cups): This is our main chocolate flavor. I use a good quality chip here, because we’re melting them. Cheap chocolate can taste waxy. Semi-sweet gives us a deep chocolate base that isn’t overly sweet, which is crucial because the caramel center is super sweet. You can use bittersweet if you’re a dark chocolate fanatic like me sometimes.
- Unsalted Butter (3 tablespoons): Just a bit, to help melt the chocolate smoothly and add richness. Using unsalted lets us control the salt level ourselves. If you only have salted, just reduce the added salt in the dough by a tiny pinch.
- Large Eggs (2): They need to be at room temperature. This is non-negotiable, people. Cold eggs will make the melted chocolate seize up into a grainy mess. I just pop mine in a bowl of warm water for 5 minutes if I forgot to take them out. They bind everything together and add structure.
- Granulated Sugar (1/2 cup) & Packed Light Brown Sugar (1/2 cup): The dynamic duo. White sugar helps them spread a little and get crispy edges. Brown sugar is the MVP for chewiness and that moist, almost toffee-like depth. Don’t pack it like you’re punishing it, just press it gently into the cup.
- Pure Vanilla Extract (2 teaspoons): The flavor booster. It rounds out the chocolate and makes everything taste more…complete. I use the real stuff. The imitation kind has a weird aftertaste to me, especially in a recipe where chocolate is the star.
- All-Purpose Flour (1 cup): The backbone. It gives the cookies structure so they don’t just turn into a puddle. We’re not using a ton, which is why they stay so fudgy.
- Unsweetened Cocoa Powder (1/4 cup): This is the second layer of chocolatey-ness. It deepens the color and intensifies the flavor without adding more sweetness. Use a natural, non-alkalized cocoa powder here for the best flavor.
- Baking Soda (1/2 teaspoon) & Salt (1/2 teaspoon): The leavening and the flavor enhancer. Baking soda helps them rise just a bit. The salt is absolutely critical. It cuts the intense sweetness and makes the chocolate flavor pop. I often use a flaky sea salt for this.
- Soft Caramel Candies (about 24 pieces): THE HEART OF THE OPERATION. This is Aunt Margie’s secret. Not caramel sauce, not a block. Those soft, square caramel candies, individually wrapped. They hold their shape in the dough but melt perfectly into that liquid center in the oven. I’ve tried the fancy stuff. This humble candy works best. Trust me on this.
Step-by-Step Instructions: Your Path to Cookie Glory
Okay, apron on. Clear some space. Let’s make some magic—and hopefully avoid setting off the smoke alarm.
1. The Chocolate Meltdown. First, grab a medium-sized, heatproof bowl. Toss in your 1 1/2 cups of chocolate chips and the 3 tablespoons of butter. Now, you can do this over a pot of barely simmering water (a double boiler), making sure the bowl doesn’t touch the water. Or, you can be like me and use the microwave. Microwave in 30-second bursts, stirring really well after each burst, until it’s just smooth and melted. This usually takes about 90 seconds total. DO NOT overheat it. If it gets too hot, the chocolate can separate and get grainy. Just let it cool for a few minutes until it’s warm, not hot, to the touch.
2. The Sugar Shuffle. In a large mixing bowl, combine your room-temperature eggs, both sugars, and the vanilla. Use a hand mixer or a sturdy whisk and beat this for a good 2-3 minutes. You want it to become pale, thick, and creamy. This step incorporates air, which helps with the texture. It should look like a light brown, frothy latte. This is where I used to rush. Don’t be like old me.
3. The Chocolate Marriage. Now, pour your slightly cooled, melted chocolate mixture into the egg and sugar mixture. Fold it in gently with a spatula at first, then you can switch to the mixer on low until it’s all one gorgeous, glossy, dark brown batter. It smells amazing already.
4. The Dry Team Assembly. In a separate, smaller bowl, whisk together your flour, cocoa powder, baking soda, and salt. Please, whisk it. This ensures the baking soda and salt are evenly distributed so you don’t get a bitter bite in one cookie. I’ve forgotten to whisk before. It’s not ideal.
5. Bringing It All Home. Add the dry ingredients to the wet chocolate mixture. Mix on low speed just until the flour disappears. Seriously, stop as soon as you don’t see white streaks. Overmixing here makes tough cookies. The dough will be thick, sticky, and incredibly fudgy. Cover the bowl with plastic wrap and now, the hardest part: chill it for at least 2 hours, or up to overnight. I know, I know. But this is the single most important tip. This firm dough is what will hold the caramel inside instead of letting it bleed out all over your pan. I sometimes make the dough after dinner and bake them fresh the next afternoon.
6. The Caramel Secret. When you’re ready to bake, preheat your oven to 350°F (175°C). Line your baking sheets with parchment paper. Not wax paper. Parchment. Take your chilled dough. It’ll be firm. Use a tablespoon or a small cookie scoop to portion out dough balls, about 1.5 tablespoons each. Now, take a dough ball, flatten it slightly in your palm, and place one soft caramel candy in the center. Carefully fold the dough up and around the caramel, pinching it sealed, and roll it back into a neat ball. Make sure the caramel is completely enclosed! Place the balls about 2 inches apart on the sheet—they will spread a little.
7. The Bake. Bake for 10-12 minutes. The cookies will look set around the edges but still very soft in the middle. They will puff up and then fall a bit as they cool, creating those lovely crinkles. Do not overbake them dreaming of a crispy cookie! That center needs to stay soft for the caramel to be gooey. Let them cool on the baking sheet for 5 full minutes. They are basically molten lava inside at this point. Then, transfer them to a wire rack to cool completely. Or, you know, eat one immediately and accept the minor tongue burn as a rite of passage.
Pro Tips & Variations
Once you’ve mastered the basic, the world is your oyster.
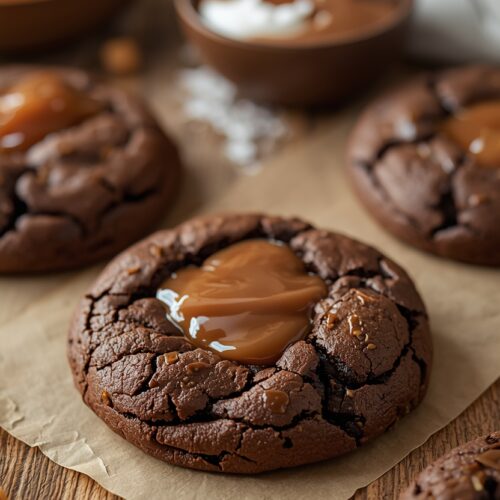
- Sea Salt Sprinkle: Right when the cookies come out of the oven, while they’re still soft and hot, press a few flakes of flaky sea salt on top of each one. It’s chef’s kiss.
- Stuffed with More Stuff: Add a handful of chopped toasted pecans or walnuts to the dough. Or, place a small square of your favorite chocolate bar inside with the caramel for a double-stuffed situation.
- Different Candy Center: Try using a Rolo candy instead of a plain caramel square. Chocolate and caramel, already together!
- Holiday Twist: Use the seasonal caramel-filled chocolate candies you see around Halloween or Christmas.
What to Serve It With
These cookies are a decadent dessert all on their own. But if you’re making an event of it, I love serving them slightly warm with a big scoop of vanilla bean ice cream on the side. The hot/cold, gooey/creamy combo is unreal. A tall glass of cold milk is the classic, perfect pairing. For a grown-up gathering, I find a cup of strong black coffee or a decaf espresso helps cut the richness beautifully. Honestly, they’re perfect with just a cozy blanket and a good movie.
Storage and Reheating Tips
These cookies are best enjoyed the day they are made, when the caramel is at its peak gooiness. But if you have leftovers (a miracle), here’s how to handle them:
Let the cookies cool completely. Store them in an airtight container at room temperature for up to 3 days. The caramel center will firm up but will still be deliciously chewy.
To recapture that fresh-from-the-oven magic, you can reheat a cookie in the microwave for 8-12 seconds. Just until it’s warm to the touch. Any longer and the caramel can become too liquid and leak, or the cookie can get tough. I learned that the hard way, with a sad, soggy-bottomed cookie.
You can also freeze the baked and cooled cookies. Layer them between sheets of parchment in an airtight container and freeze for up to 2 months. Thaw at room temperature or give them a quick microwave zap.
Even better, you can freeze the unbaked dough balls (with the caramel inside) on a parchment-lined sheet. Once frozen solid, transfer them to a freezer bag. You can bake them straight from frozen, just add 1-2 minutes to the bake time. Having frozen cookie dough on hand is a dangerous, wonderful thing.
Frequently Asked Questions
Can I use homemade caramel or caramel sauce?
I don’t recommend it for the center. It’s usually too runny and will almost certainly leak out and burn. The beauty of the soft caramel candies is their perfect melting point and stability. Save the sauce for drizzling on top after baking if you want!
My caramel leaked out everywhere! What happened?
Two likely culprits: 1) The dough wasn’t chilled enough. It needs to be firm to seal properly. 2) The caramel wasn’t fully enclosed. Make sure you pinch the dough sealed really well. 3) You might have overbaked them, causing the structure to break down.
Can I make these gluten-free?
I haven’t tried it myself, but a trusted 1-to-1 gluten-free all-purpose flour blend should work in place of the regular flour. The texture might be slightly different.
My cookies didn’t spread much and are very cakey.
This usually means you measured the flour incorrectly, likely by scooping the cup directly from the bag, which packs it in. Use the spoon-and-level method: spoon flour into your measuring cup and level it off with a knife. Also, double-check your baking soda isn’t expired.
Customizations for Special Diets
Gluten-Free: As mentioned, substitute the all-purpose flour with a quality gluten-free all-purpose blend. Check that your caramel candies are also gluten-free.
Dairy-Free: Use dairy-free chocolate chips and a plant-based butter alternative. Check the labels on your caramel candies carefully, as many contain butter. Some specialty stores carry vegan caramels.
Lower-Sugar: This is a tough one for this specific recipe, as the caramel center is pure sugar. You could try using a sugar substitute blend in the dough, but the caramel will remain high in sugar. For more ideas on balancing sweetness, you can read about unrefined sweeteners as alternatives for the dough portion.
Common Mistakes to Avoid
- Skipping the Chill Time: I feel like a broken record, but this is mistake number one. Warm dough = flat, spreading cookies with leaked caramel.
- Using Cold Eggs: They will cause the melted chocolate to seize. Please, take the time to warm them up.
- Overmixing the Dough After Adding Flour: Mix just until combined. Tough cookies are sad cookies.
- Overbaking: They will continue to cook on the hot baking sheet. Take them out when they look slightly underdone in the middle for the perfect fudgy texture.
- Not Sealing the Caramel Completely: Take an extra second to make sure that caramel is fully encased in dough. A tiny pinprick can be an escape route for molten sugar.
Troubleshooting Your Cookies
| Problem | Likely Cause | How to Fix It |
|---|---|---|
| Caramel leaked out and pooled/burned | Dough not chilled enough, caramel not sealed, or overbaking. | Ensure dough chills fully, pinch dough sealed tightly, and reduce bake time by 1-2 minutes. |
| Cookies are flat and greasy | Dough wasn’t chilled, or butter was too warm when incorporated. | Chill dough thoroughly before baking. Ensure melted chocolate/butter mixture has cooled before adding to eggs. |
| Cookies are too cakey and didn’t spread | Too much flour, or baking soda is expired. | Measure flour correctly using spoon-and-level method. Test baking soda for freshness. |
| Caramel is hard and chewy, not gooey | Cookies were overbaked, or caramels were the wrong type (hard candies). | Bake for less time. Use only soft, wrapped caramel candies, not hard toffees. |
| Chocolate dough is grainy | Eggs were too cold and seized the chocolate, or chocolate was overheated when melting. | Use room temp eggs. Melt chocolate gently and allow to cool slightly before adding to eggs. |
Final Thoughts
These chocolate caramel cookies are more than just a dessert to me now. They’re a reminder that the best things often come from humble beginnings (and a little family rivalry). They represent a victory after a string of messy, hilarious failures in my kitchen. They’re the recipe I’m most proud of, not because it’s complicated, but because I fought for it, tweaked it, and now I get to share that win with you.
There’s something so deeply satisfying about pulling a tray of these from the oven, watching someone take that first tentative bite, and then seeing their face light up with that “Oh, WOW” expression. It gets me every time. It’s the taste of patience, of a secret successfully kept and then joyfully shared.
So I really hope you give them a try. Embrace the sticky fingers and the mandatory chill time. And when you pull your own perfect batch out of the oven, think of me and my Aunt Margie, and the great cupcake-cookie truce of 2018.
I’d love to hear how your batch turns out. Did you add nuts? Try a different candy inside? Be honest—how many did you eat straight from the baking sheet while they were still dangerously hot? Tell me everything in the comments. And if you’re looking for another show-stopping dessert to try, I’ve got a whole treasure trove of ideas in my desserts category.
Chocolate Caramel Cookies
Ingredients
For the Cookie Dough:
- 1 1/2 cups {265 grams} semi-sweet chocolate chips
- 3 tablespoons {42 grams} unsalted butter
- 2 large eggs room temperature
- 1/2 cup {100 grams} granulated sugar
- 1/2 cup {110 grams} packed light brown sugar
- 2 teaspoons {10 ml} pure vanilla extract
- 1 cup {125 grams} all-purpose flour
- 1/4 cup {25 grams} unsweetened cocoa powder
- 1/2 teaspoon baking soda
- 1/2 teaspoon salt
For the Filling:
- 24 soft caramel candies individually wrapped
Instructions
Step 1: Melt Chocolate and Butter
- Combine the semi-sweet chocolate chips and unsalted butter in a heatproof bowl. Melt in the microwave in 30-second bursts, stirring well after each, or over a double boiler until smooth. Set aside to cool slightly.
Step 2: Cream Wet Ingredients
- In a large mixing bowl, beat the room-temperature eggs, granulated sugar, brown sugar, and vanilla extract together with a hand mixer or whisk for 2-3 minutes, until the mixture is pale, thick, and creamy.
- Step 3: Combine with Chocolate
- Pour the slightly cooled melted chocolate mixture into the egg and sugar mixture. Mix on low speed until fully combined and the batter is uniform, glossy, and dark brown.
Step 4: Add Dry Ingredients
- In a separate bowl, whisk together the flour, cocoa powder, baking soda, and salt. Add these dry ingredients to the wet chocolate mixture. Mix on low speed just until no streaks of flour remain. Do not overmix.
Step 5: Chill the Dough
- Cover the bowl with plastic wrap and refrigerate the dough for at least 2 hours, or up to overnight, until firm.
Step 6: Assemble Cookies
- Preheat oven to 350°F (175°C). Line baking sheets with parchment paper. Scoop 1.5 tablespoons of chilled dough, flatten it slightly in your palm, and place one soft caramel candy in the center. Fold the dough around the caramel, pinching it sealed, and roll into a smooth ball. Place dough balls 2 inches apart on the prepared sheets.
Step 7: Bake
- Bake for 10-12 minutes, until the edges are set but the centers still look soft. The cookies will puff and then fall slightly. Allow cookies to cool on the baking sheet for 5 minutes before transferring to a wire rack to cool completely.