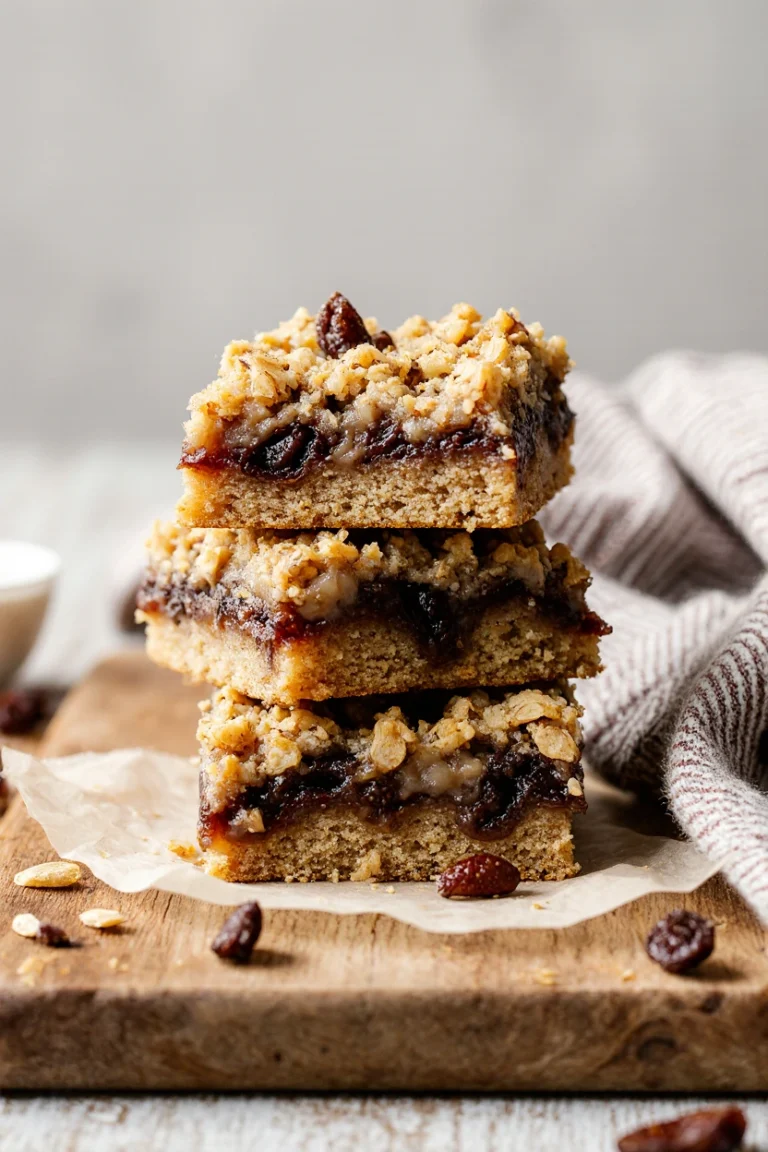
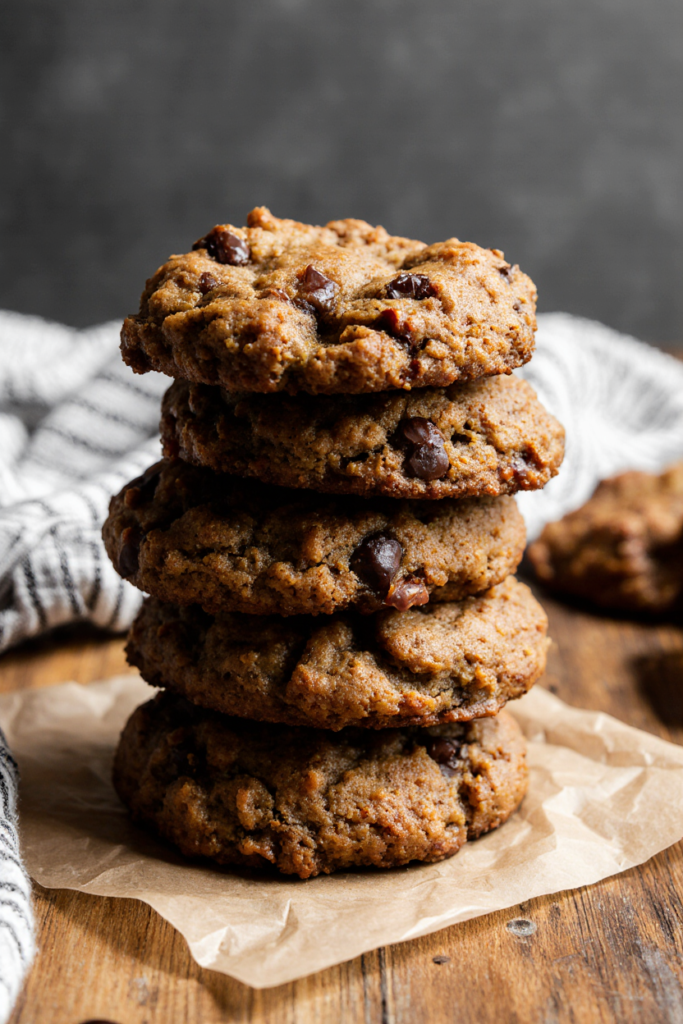
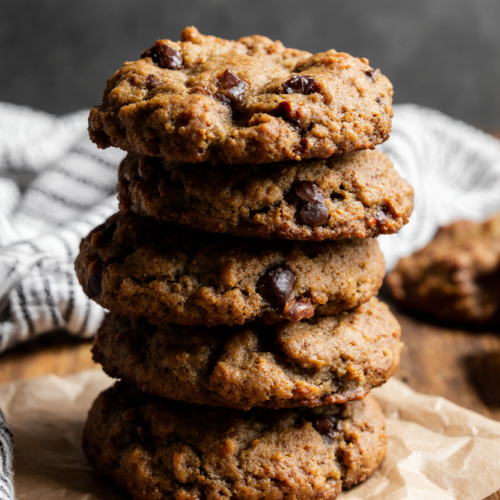
The Best Fudgy Chewy Browkies (Brookies)
Table of Contents
I have a confession to make: I am, fundamentally, an indecisive person. It takes me ten minutes to pick a movie, I can never decide between tea and coffee, and the idea of choosing between a brownie and a cookie at a bakery has, on more than one occasion, caused me genuine, albeit delicious, distress. Do I want the rich, fudgy, chocolate-slab satisfaction of a brownie? Or the chewy, slightly crisp-edged, portable joy of a chocolate chip cookie? It’s an impossible choice.
That is, until the day I decided to just… not choose.
It was a rainy Sunday, the kind that makes your kitchen feel like the only cozy cave in the world. I was staring at two nearly-empty bags of chocolate chips—one semisweet, one milk—and had a wild, probably sugar-deprived thought. What if I just smashed them together? Not as separate entities on a plate, but as one unified, chaotic, glorious hybrid. The result wasn’t just a baking experiment; it was the birth of my kitchen’s favorite resident: the Fudgy Chewy Browkie. Or, as the internet cleverly calls it, the Brookie.
My first attempt was, to be real, a bit of a mess. The cookie dough slid into the brownie batter, I forgot to set a timer, and I pulled out a pan that was somehow both underbaked in the center and a little too dark on the edges. But you know what? We ate the entire thing, standing around the pan with forks, picking out the perfect bites that had swirls of both textures. It was a happy accident that tasted like pure, unadulterated comfort. It’s the bake that doesn’t ask you to pick a side. It’s the ultimate crowd-pleaser, the solution to dessert debates, and honestly, the most fun you can have with a mixing bowl. Let’s make them.
Why You’ll Love This Recipe
If you’re still on the fence about committing to this beautiful mess, let me break it down for you.
- It Solves The Great Dessert Debate. Serving a crowd? Someone always wants a brownie, someone else craves a cookie. This recipe is the ultimate peace treaty. It’s the dessert equivalent of having your cake and eating it too, literally.
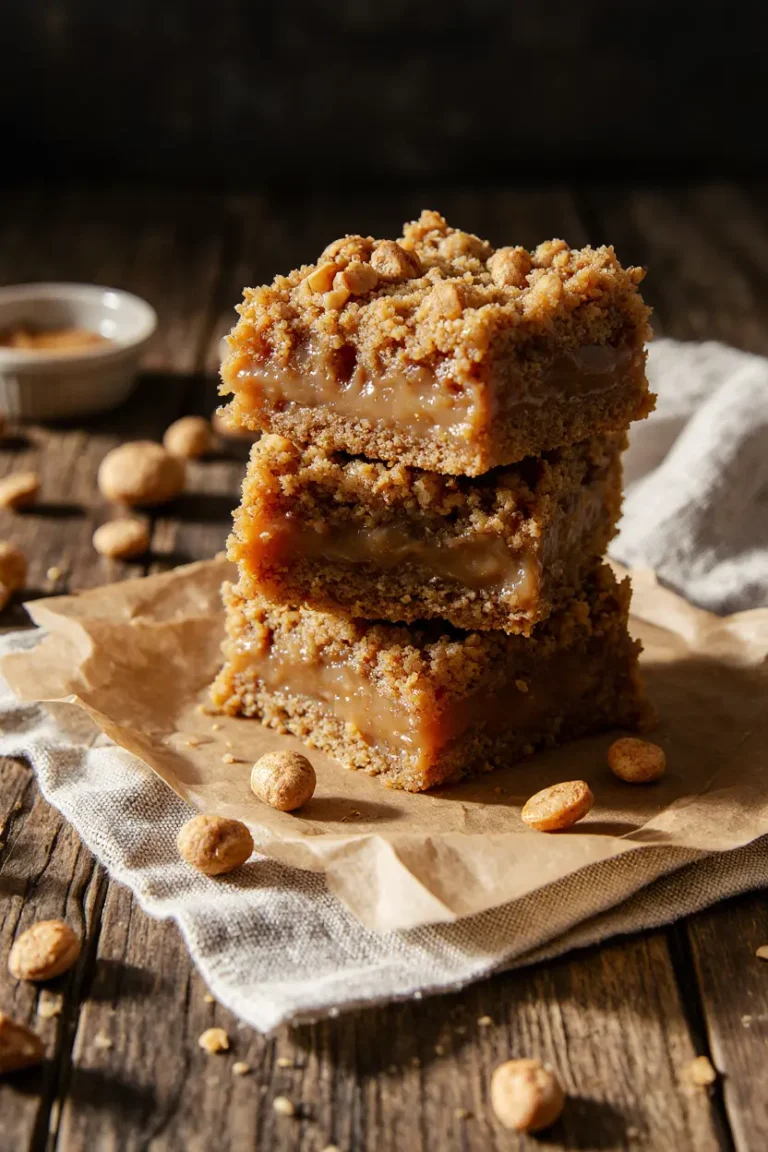
- The Textural Symphony is Unbeatable. We’re talking about the fudgy, damp-crumbed, intensely chocolatey heart of a brownie, married to the chewy, buttery, slightly structured bite of a chocolate chip cookie. Every square is a surprise. Some bites are more one than the other, and finding a spot where they’re perfectly swirled is a little victory.
- It’s Surprisingly Simple. Don’t let the two-layers thing intimidate you. Both components are straightforward, no-fuss recipes. You’re basically making two incredibly easy batters and plopping them together. The magic happens in the oven all by itself.
- It’s Forgiving. Remember my first oops moment? Even when it’s not “perfect,” it’s still absurdly delicious. A little underbaked? Gooey fudginess. A little overbaked? Crispy, chewy edges. It’s a win-win.
- The Ultimate Comfort Food. There’s something deeply nostalgic and satisfying about this combo. It’s the bake that makes your kitchen smell like a childhood memory, the one that makes everyone gather around, the one that feels like a warm hug on a plate. It just makes ya feel good.
Ingredients for The Best Fudgy Chewy Browkies
Grab two bowls—we’re splitting things up logically. And a quick note: use the best quality you can for the chocolate and cocoa powder. It really, really makes a difference here.
For the Fudgy Brownie Layer:
- 1/2 cup (115g) unsalted butter, melted and slightly cooled
- 1 cup (200g) granulated sugar
- 2 large eggs, at room temperature
- 1 teaspoon pure vanilla extract
- 1/2 cup (65g) all-purpose flour
- 1/3 cup (35g) unsweetened cocoa powder (I use a Dutch-processed one for a darker, richer flavor)
- 1/4 teaspoon salt
- 1/4 teaspoon baking powder
- 1/2 cup (90g) semisweet chocolate chips
For the Chewy Cookie Layer:
- 1/2 cup (115g) unsalted butter, softened at room temperature (this is key for chewiness!)
- 1/2 cup (100g) packed light brown sugar
- 1/4 cup (50g) granulated sugar
- 1 large egg, at room temperature
- 1 teaspoon pure vanilla extract
- 1 1/4 cups (160g) all-purpose flour
- 1/2 teaspoon baking soda
- 1/2 teaspoon salt
- 1 cup (180g) chocolate chips (I use a mix of semisweet and milk chocolate for complexity)
Step-by-Step Instructions
Alright, tie your apron, clear some counter space, and let’s get into it. I’m walking you through this exactly how I do it, messy counters and all.
1. Prep and Preheat.
First things first: preheat your oven to 350°F (175°C). This gives it plenty of time to get to the right temperature. Then, line an 8×8 inch baking pan with parchment paper, leaving some overhang on the sides. This is your lifeline for getting these beautiful brick-shaped brookies out later. Trust me, you don’t want to skip this. Lightly grease the parchment too. Set the pan aside.
2. Make the Brownie Batter.
In a medium bowl, whisk together the melted butter and granulated sugar. It’ll look a bit gritty, that’s fine. Add the two eggs and the vanilla extract. Whisk it really vigorously for a good minute or two. You want it to look slightly pale and well combined. This little bit of effort helps create that shiny, crackly top we all love on brownies.
Now, grab a sifter or a fine-mesh strainer. Place it over the wet ingredients and add the flour, cocoa powder, salt, and baking powder right into it. Sift it all directly into the bowl. This is my secret weapon for avoiding lumps of cocoa or flour—nothing worse than biting into a pocket of raw flour, ugh. Gently fold the dry ingredients into the wet with a spatula. Just until you no longer see dry streaks. Do not overmix! Overmixing is the enemy of fudginess. Finally, fold in the 1/2 cup of semisweet chocolate chips. Set this gorgeous, glossy batter aside.
3. Make the Cookie Dough.
In a separate, larger bowl, we’re creaming the butter and sugars. Using a hand mixer or a stand mixer fitted with the paddle, beat the softened butter, brown sugar, and granulated sugar together on medium speed for about 2-3 minutes. You want it to be light, fluffy, and well combined. Scrape down the sides of the bowl. Add the egg and vanilla, and beat again until smooth.
In another small bowl, whisk together the flour, baking soda, and salt. With your mixer on low, gradually add the dry ingredients to the butter mixture. Mix just until the flour disappears. Honestly, I sometimes stop the mixer before it’s fully combined and finish by hand with a spatula to avoid overworking the dough. Once it’s together, fold in that glorious cup of mixed chocolate chips.
4. The Grand Assembly (The Fun Part!).
Here’s where you get to be an artist. You have two main methods:
- The Dollop & Swirl: This is my favorite for maximum marbling. Drop alternating spoonfuls of the brownie batter and cookie dough all over the bottom of your prepared pan. Try to get somewhat even coverage. Then, take a knife or a skewer and gently swirl it through the layers just a few times. Don’t overdo it! You want distinct pockets, not a homogenous mud.
- The Pressed Layer: For more defined layers, spread about 2/3 of the brownie batter in the bottom of the pan. It will be a thin layer. Then, take chunks of the cookie dough, flatten them slightly in your hands, and place them in a somewhat even layer over the brownie batter. Dot the remaining brownie batter over the top of the cookie dough layer. It won’t cover everything, and that’s perfect.
5. Bake to Perfection.
Slide the pan into your preheated oven. Now, the hardest part: waiting. Bake for 35-45 minutes. I always start checking at 30. The top should be set, the edges will be pulling away slightly from the pan, and a toothpick inserted into the center should come out with a few moist crumbs attached, not wet batter. Remember, it will continue to cook as it cools. If you wait for a clean toothpick, you’ve overbaked into cakey territory.
6. The Crucial Cool Down.
I know, I know. The smell is intoxicating. But you have to let these rest. Place the pan on a wire rack and let the brookies cool completely in the pan. This feels like torture, but it’s non-negotiable. It allows the structures to set, making them chewy and fudgy instead of a molten, fall-apart mess when you cut them. For clean cuts, I sometimes even pop the whole pan in the fridge for an hour after it’s reached room temperature. Then, use the parchment paper overhang to lift the entire slab out onto a cutting board. Slice into squares with a sharp knife.
What to Serve Brookies With
These are a star all on their own, but hey, life is about pairing joys.
- A Cold Glass of Milk: The classic for a reason. It’s perfection.
- A Scoop of Vanilla Ice Cream: While still slightly warm? You’ve just created a next-level sundae. The hot/cold, fudgy/creamy contrast is mind-blowing.
- A Dollop of Whipped Cream & Berries: For when you want to fancy it up a bit and cut the richness with some tart fruit.
- Your Favorite Coffee or Tea: A strong cup of coffee or a milky chai is the ideal adult companion to this sweet treat. It turns it into a proper afternoon moment.
Pro Tips & Variations
Once you’ve mastered the basic brookie, the world is your oyster.
- Sea Salt Sprinkle: Right when the brookies come out of the oven, sprinkle a tiny bit of flaky sea salt over the top. It amplifies the chocolate flavor like you wouldn’t believe.
- Nutty Crunch: Fold 1/2 cup of chopped walnuts or pecans into either the brownie or cookie layer (or both!).
- Peanut Butter Paradise: Swirl 1/3 cup of warm peanut butter into the batters before baking.
- Mint Chip: Use mint chocolate chips in the cookie layer for a cool, refreshing twist.
- S’mores Style: Add a handful of mini marshmallows and crushed graham cracker pieces to the top in the last 5 minutes of baking.
- Make it Fancier: Use chopped high-quality chocolate bars instead of chips for more nuanced flavor and puddles of chocolate.
Storage and Reheating Tips
- Room Temp: Store cooled brookies in an airtight container at room temperature for up to 3 days. They’re best within 48 hours, in my opinion.
- Freezing: These freeze like a dream! Wrap individual squares tightly in plastic wrap, then place them in a freezer bag. They’ll keep for up to 3 months. Thaw at room temperature or, my favorite, pop a frozen square in the microwave for 15-20 seconds for an instant, warm, gooey treat.
- Reheating: To revive that fresh-baked feel, warm a square in a 300°F oven for 5-8 minutes, or in the microwave for 10-15 seconds. Be careful with the microwave—it can make them tough if you overdo it. I learned that the hard way!
Frequently Asked Questions
Can I use a box mix for the brownie part?
You totally can, in a pinch. Prepare the mix according to the “fudgy” style directions on the box. Just know that the from-scratch version has a depth of flavor that’s hard to beat.
My cookie dough seems too thick to spread/spoon. What did I do wrong?
You probably measured the flour a little heavy. It’s okay! Just use your fingers or a spoon to press and dollop it. The dough is meant to be thick. If it’s truly crumbly, you can add a teaspoon of milk to bring it together.
Why did my layers completely mix together?
You probably over-swirled. A few gentle figure-eight motions with a knife are plenty. We’re going for marbling, not homogenization.
Can I double this recipe?
Absolutely! Double all ingredients and bake in a 9×13 inch pan. You’ll likely need to add 5-10 minutes to the bake time. Keep a close eye on it.
Customizations for Special Diets
- Gluten-Free: Substitute your favorite 1:1 gluten-free flour blend for the all-purpose flour in both layers. The texture might be slightly more crumbly but still delicious. For more on this approach, you can read about the gluten-free diet.
- Dairy-Free: Use plant-based butter sticks (not margarine spread) and ensure your chocolate chips are dairy-free.
- Lower Sugar: You can try reducing the granulated sugar in the brownie layer by 1/4 cup, though it will affect texture. For insights into sugar alternatives, the list of unrefined sweeteners is a helpful resource.
Common Mistakes to Avoid
- Using Cold Ingredients: Room temperature eggs and butter (for the cookie dough) are crucial for proper emulsification and texture. Cold butter won’t cream properly.
- Overmixing the Brownie Batter: Fold, don’t beat. Once the flour is in, gentle strokes are your friend.
- Overbaking: This is the #1 killer of fudginess. Take them out when there are moist crumbs on the toothpick.
- Skipping the Parchment Paper: You’ll regret it when you try to get them out of the pan.
- Cutting While Hot: I’ve done it. It’s a smushed, delicious tragedy. Wait.
Troubleshooting Your Brookies
| Problem | Likely Cause | How to Fix Next Time |
|---|---|---|
| Brookies are dry and cakey | Overbaking, or overmixing the brownie batter | Check earlier, remove with moist crumbs. Fold batter gently. |
| Cookie layer is flat and hard | Butter was too soft/melted, or baking soda was old | Ensure butter is just softened (cool to the touch). Test your baking soda. |
| Brownie layer is greasy | Butter and batter were improperly emulsified | Whisk the melted butter/sugar/eggs very well until slightly pale. |
| Layers separated cleanly | Batters were too cold or not swirled/pressed together | Ensure batters are at similar (room) temp. Press cookie dough into brownie layer. |
| Middle is completely raw | Oven temp too high, pan too small | Use an oven thermometer. Ensure pan is correct size. |
Final Thoughts
So, there you have it. My not-so-secret, slightly messy, absolutely foolproof path to brookie bliss. This recipe is more than just a dessert for me now. It’s the one I make when friends are coming over and I want to impress without stress. It’s the one my family requests for birthdays over a traditional cake. It’s my go-to for potlucks because it always, without fail, disappears first and makes people ask for the recipe.
It’s a reminder that sometimes the best things in life come from not choosing, from embracing the “and” instead of the “or.” Fudgy and chewy. Brownie and cookie. Simple and spectacular.
I’d love to know—how do you tackle the great brownie vs. cookie debate? And if you make these, what wild and wonderful variation did you try? Tell me in the comments. And if you’re looking for more decadent treats to round out your menu, I’ve got a whole section dedicated to glorious desserts waiting for you.
Now, go preheat that oven. Your ultimate comfort food awaits.
The Best Fudgy Chewy Brookies (Brookies): The Ultimate Comfort Food
Ingredients
For the Fudgy Brownie Layer:
- 1/2 cup {115g} unsalted butter melted and slightly cooled
- 1 cup {200g} granulated sugar
- 2 large eggs at room temperature
- 1 teaspoon pure vanilla extract
- 1/2 cup {65g} all-purpose flour
- 1/3 cup {35g} unsweetened cocoa powder
- 1/4 teaspoon salt
- 1/4 teaspoon baking powder
- 1/2 cup {90g} semisweet chocolate chips
For the Chewy Cookie Layer:
- 1/2 cup {115g} unsalted butter softened at room temperature
- 1/2 cup {100g} packed light brown sugar
- 1/4 cup {50g} granulated sugar
- 1 large egg at room temperature
- 1 teaspoon pure vanilla extract
- 1 1/4 cups {160g} all-purpose flour
- 1/2 teaspoon baking soda
- 1/2 teaspoon salt
- 1 cup {180g} chocolate chips mix of semisweet and milk chocolate
Instructions
Preparation:
- Preheat oven to 350°F {175°C}.
- Line an 8×8 inch baking pan with parchment paper, leaving overhang on two sides. Lightly grease the parchment.
Make Brownie Batter:
- In a medium bowl, whisk melted butter and granulated sugar until combined.
- Vigorously whisk in the 2 eggs and vanilla extract for 1-2 minutes until slightly pale.
- Sift the flour, cocoa powder, salt, and baking powder directly into the wet ingredients.
- Gently fold the dry ingredients into the wet with a spatula until just combined. Do not overmix.
- Fold in the 1/2 cup of semisweet chocolate chips. Set batter aside.
Make Cookie Dough:
- In a large bowl using a hand mixer, beat softened butter, brown sugar, and granulated sugar on medium speed for 2-3 minutes until light and fluffy.
- Beat in the egg and vanilla extract until smooth.
- Whisk flour, baking soda, and salt in a separate bowl.
- With mixer on low, gradually add dry ingredients to butter mixture, mixing just until flour disappears.
- Fold in the 1 cup of mixed chocolate chips with a spatula.
Assemble the Layers:
- Dollop alternating spoonfuls of brownie batter and cookie dough all over the bottom of the prepared pan.
- Use a knife or skewer to gently swirl the two batters together 3-4 times for a marbled effect. Do not over-swirl.
Bake:
- Place pan in preheated oven and bake for 35-45 minutes.
- Bake until the top is set, edges pull away slightly, and a toothpick inserted into the center comes out with a few moist crumbs attached (not wet batter).
Cool & Serve:
- Let brookies cool completely in the pan on a wire rack. For cleanest cuts, chill in the pan for 1 hour after cooling.
- Use parchment overhang to lift the slab from the pan. Cut into 16 squares with a sharp knife.