Drumstick Chicken Recipe
Table of Contents
You know that feeling when you walk into a house and it just smells like happiness? Like someone, somewhere, is taking care of everything. That’s the power of chicken drumsticks roasting in the oven. I discovered this not in some fancy cooking class, but on a total whim during one of those “I have zero energy but we have to eat” kind of Wednesday nights. The kids were hangry, the dog was underfoot, and I was staring into the fridge abyss, praying for inspiration to descend.
All I had was a pack of drumsticks, some basic pantry stuff, and a desperate hope. I tossed them together, shoved them in the oven, and fully expected to be ordering pizza in 45 minutes. But then… the smell started. This incredible, savory, mouth-watering aroma that slowly took over the entire first floor. My husband wandered in from the garage asking, “What’s the special occasion?” The kids peeked in, asking if it was done yet. And when I pulled that tray out? Magic. The skin was crackling and golden, the meat was falling-off-the-bone juicy, and we devoured the entire batch standing around the kitchen island, fingers sticky, completely forgetting about the chaos of ten minutes prior.
That’s the beauty of this drumstick chicken recipe. It’s not about perfection; it’s about transformation. It takes the most humble, affordable, family-friendly cut of chicken and turns it into a celebratory feast with almost zero effort. It’s forgiving, it’s flexible, and it delivers that crispy-on-the-outside, tender-on-the-inside perfection every single time. If you’re looking for a surefire way to win dinner, with minimal cleanup and maximum flavor, you’ve just found your new kitchen best friend.
Why You’ll Love This Recipe
- The Ultimate Textural Joy: Let’s be real, the best part of any chicken is the skin. This method guarantees skin so shatteringly crisp you’ll hear it crackle when you bite in, while the dark meat underneath stays incredibly moist and flavorful. It’s a symphony in every bite.
- Kind to Your Wallet: Drumsticks are one of the most economical cuts you can buy. This recipe lets you feed a crowd (or have amazing leftovers) without stressing the grocery budget. Homemade never tasted so cost-effective.
- Your Flavor Canvas: The basic recipe is a golden, garlicky, herby masterpiece. But the drumstick is like a blank slate waiting for your personal touch. Smother it in sticky honey-garlic glaze, drench it in zesty lemon-herb marinade, or coat it in smoky barbecue spices. I’ll give you all the variations you could dream of.
- Unfussy and Forgiving: No need for a meat thermometer poking every piece (though you can if you want!). No frantic pan-searing. Just mix, bake, and bask in the glory. It’s perfect for beginner cooks and still satisfying for seasoned pros.
- Leftovers That Actually Get Eaten: Cold drumsticks straight from the fridge? A lunchbox superstar. Shredded meat for tomorrow’s salads, soups, or tacos? Absolutely. This is meal-prep that doesn’t feel like a chore.
Ingredients for Perfect Oven-Baked Drumstick Chicken
Gathering your stuff is half the battle. Here’s what you need, and why you need it. Trust me, I’ve tried shortcuts.
For the Chicken & Dry Rub:
- 8-10 chicken drumsticks (about 3-3.5 lbs): The star. Look for ones that are similar in size so they cook evenly. I sometimes pat them extra dry with a paper towel if they seem wet—helps the crisp factor.
- 2 tablespoons olive oil: This helps the seasoning stick and promotes browning. Don’t skip it!
- 1 ½ teaspoons kosher salt: Crucial for flavor. If you’re using fine table salt, use about 1 teaspoon.
- 1 teaspoon black pepper: Freshly ground if you have it, but the pre-ground stuff works in a pinch.
- 1 ½ teaspoons garlic powder: Gives that deep, rounded garlic flavor without burning.
- 1 ½ teaspoons paprika: Sweet or smoked—your choice! Smoked paprika adds a wonderful, warm depth.
- 1 teaspoon dried thyme or oregano: I’m a thyme girl, personally. It just feels… classic.
- ½ teaspoon onion powder: The subtle sweetness it adds is everything.
That’s it! See? No crazy ingredients. Now, for the optional but highly recommended glaze for the last 10 minutes:
- 2 tablespoons pure maple syrup or honey: For a gorgeous, sticky-sweet caramelized finish. I’ve used agave too, and it works.
- 1 tablespoon soy sauce or tamari: The salty-umami punch that balances the sweetness perfectly.
- 1 clove garlic, minced: Because fresh garlic at the end is a game-changer.
Step-by-Step Instructions
Okay, apron on (or not, I usually forget). Let’s make some magic happen. Preheat your oven to 425°F (220°C). Yes, that’s hot! It’s the secret to the crisp skin. Place a rack in the middle position.
1. Dry the Drumsticks. This might be the most important step I ever learned the hard way. Take those drumsticks and give them a good pat-down with paper towels. Get them as dry as you can. Wet skin = steamed skin, and we are not about that life. I’ve skipped this when in a rush and regretted the slightly rubbery results. Learn from my lazy mistakes!
2. Mix the Seasoning. In a small bowl, mix together the salt, pepper, garlic powder, paprika, thyme, and onion powder. I just use my fingers—it feels rustic.
3. Coat the Chicken. Place the dried drumsticks in a large bowl. Drizzle with the olive oil and use your hands to toss them, making sure every nook and cranny gets a little glossy. Then, sprinkle your seasoning mix all over. Get in there with your hands again! Massage that flavor into every piece. Don’t be shy. This is where the love happens.
4. Arrange for Success. Grab a large baking sheet. Line it with foil for easy cleanup (a non-negotiable for me on busy nights) or parchment paper. Place a wire rack on the baking sheet. Why the rack? It allows the hot air to circulate all around the chicken, cooking it evenly and preventing the bottom from getting soggy. If you don’t have a rack, it’s okay—just place them directly on the pan, but maybe flip them halfway through.
5. Bake to Perfection. Arrange the drumsticks on the rack, leaving a little space between each one. Pop them into your preheated oven. Now, set a timer for 35 minutes. Go fold some laundry, help with homework, or just stare out the window. The oven is doing the work.
6. The Optional Glaze (Do It!). While the chicken bakes, whisk together the maple syrup, soy sauce, and minced garlic in a little bowl. When that 35-minute timer goes off, pull the tray out (carefully, it’s hot!). The chicken should already look pretty gorgeous. Brush each drumstick generously with the glaze. This is where the flavor gets next-level.
7. The Final Crisp. Return the glazed tray to the oven for another 8-12 minutes. You’re looking for the skin to be deep golden brown, crisp, and the glaze to be bubbling. The internal temperature should reach 175°F (80°C) in the thickest part—dark meat loves a higher temp for tenderness.
8. Rest (If You Can Wait). Let the chicken rest on the pan for about 5 minutes before serving. This lets the juices redistribute so they stay in the meat and not all over your plate. I know, the smell is torturous. But it’s worth it.
What to Serve With Drumstick Chicken
This chicken is the friendly, outgoing main dish that gets along with everyone. Here are my go-to pairings:
- For a Classic Comfort Plate: Creamy mashed potatoes or a fluffy pile of rice to soak up all those juices. A simple side of buttery corn is perfect too.
- To Keep It Light & Fresh: A big, crunchy green salad with a tangy vinaigrette to cut through the richness. Or, some quick roasted vegetables like broccoli, carrots, or Brussels sprouts cooked on another tray in the same oven.
- The Ultimate Casual Feast: Serve with a basket of warm, crusty bread, some coleslaw, and baked beans. Perfect for a backyard feel any night of the week.
- Drink Pairings: For the grown-ups, a crisp lager or a chilled glass of pinot noir works wonderfully. For everyone, sparkling water with lemon or a fruity iced tea is just right.
Top Tips for Perfecting Your Drumstick Chicken
- Dry, Dry, Dry: I said it before, I’ll say it again. Dry skin is non-negotiable for crispiness.
- Space Them Out: Crowding the pan creates steam. Give your drumsticks some personal space for the best browning.
- Don’t Fear the High Heat: That 425°F temperature is key. It renders the fat quickly and crisps the skin before the meat has a chance to dry out.
- Use a Rack if You Can: It really does make a noticeable difference in achieving an all-around crisp exterior.
- Customize Your Flavor: Swap the paprika for chili powder for a kick. Add a teaspoon of lemon zest to the dry rub. Use your favorite herb blend. Make it yours!
Storing and Reheating Tips
- Storing: Let leftovers cool completely, then store in an airtight container in the fridge for up to 4 days.
- Reheating for Best Results: To keep the skin from getting soft, reheat in the air fryer or oven at 375°F until hot throughout (about 8-10 minutes). The microwave works in a pinch for 1-2 minutes, but it will soften the skin.
- Freezing: You can freeze cooked, cooled drumsticks in a freezer bag for up to 2 months. Thaw in the fridge overnight and reheat in the oven.
Frequently Asked Questions
Can I use chicken thighs instead?
Absolutely! Bone-in, skin-on thighs are a fantastic substitute. They may need an extra 5-10 minutes of cooking time due to their thickness.
My skin isn’t crispy. What happened?
The most likely culprits are: the chicken wasn’t dry enough before seasoning, the oven wasn’t fully preheated, or the pan was too crowded. Next time, focus on the drying step and make sure your oven is hot!
Is the internal temperature of 175°F safe?
Yes, and actually preferable for dark meat. Poultry is safe to eat at 165°F, but cooking dark meat to a higher temperature (175°F-180°F) helps break down the connective tissue, making it more tender and juicy.
Can I make this ahead of time?
You can mix the dry rub and pat the chicken dry a few hours ahead. Keep them separate in the fridge until you’re ready to coat and bake. I don’t recommend applying the rub too far in advance as the salt can start to draw out moisture.
Customizations for Special Diets
- Gluten-Free: Ensure your soy sauce or tamari is a certified gluten-free variety. All other base ingredients are naturally gluten-free.
- Lower-Sugar: Simply omit the optional glaze. The drumsticks are still incredibly flavorful without it.
- Whole30/Paleo: Use coconut aminos instead of soy sauce and ensure your maple syrup is 100% pure if using the glaze, or omit it.
Common Mistakes to Avoid
- Skipping the Drying Step: This is the #1 reason for limp skin. Just take the 30 seconds to do it.
- Using a Low Oven Temperature: Baking at 350°F will cook the chicken, but it will steam it rather than roast and crisp it. Trust the high heat.
- Basting with Sauce Too Early: If you’re using a sugar-based glaze (like honey or BBQ), applying it at the start will cause it to burn. Always add it in the last 10-15 minutes of cooking.
- Not Seasoning Enough: Drumsticks need a good amount of seasoning. Don’t be timid with the salt and spices.
Troubleshooting Table
| Problem | Likely Cause | How to Fix It Next Time |
|---|---|---|
| Soggy or Rubbery Skin | Chicken wasn’t dried before seasoning; oven temp too low; pan overcrowded. | Pat drumsticks thoroughly dry. Preheat oven fully. Use a rack and space out pieces. |
| Bland Flavor | Not enough salt or seasoning; seasoning didn’t adhere. | Be generous with the dry rub. Ensure chicken is coated in oil first to help spices stick. |
| Burnt Glaze | Glaze applied too early in cooking process. | Only apply sugary glazes in the last 10-15 minutes of cook time. |
| Dry Meat | Overcooked. | Use an instant-read thermometer. Remove at 175°F and let rest. Dark meat is forgiving, but it can dry out. |
Final Thoughts
This drumstick chicken recipe is more than just a list of instructions. It’s a ticket to an easier, more delicious dinner time. It’s the recipe I go back to when I need a win, when I want to feed people I love without stress, and when I just want my kitchen to smell like a home.
It reminds me that the best meals aren’t always the most complicated ones. Sometimes, it’s the simple, hearty, finger-licking-good dishes that create the real memories. The kind where you look around the table and see everyone happily munching away, not a phone in sight.
So give it a try this week. Play with the flavors. Make a mess. And most importantly, enjoy the incredible, crispy, juicy results. I’d love to hear how it goes for you. What’s your favorite way to season a drumstick? Be honest—do you fight over the crispiest piece at your table too?
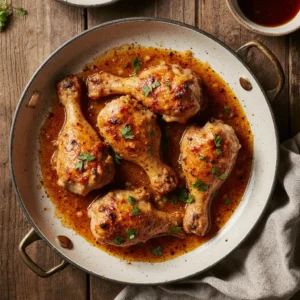
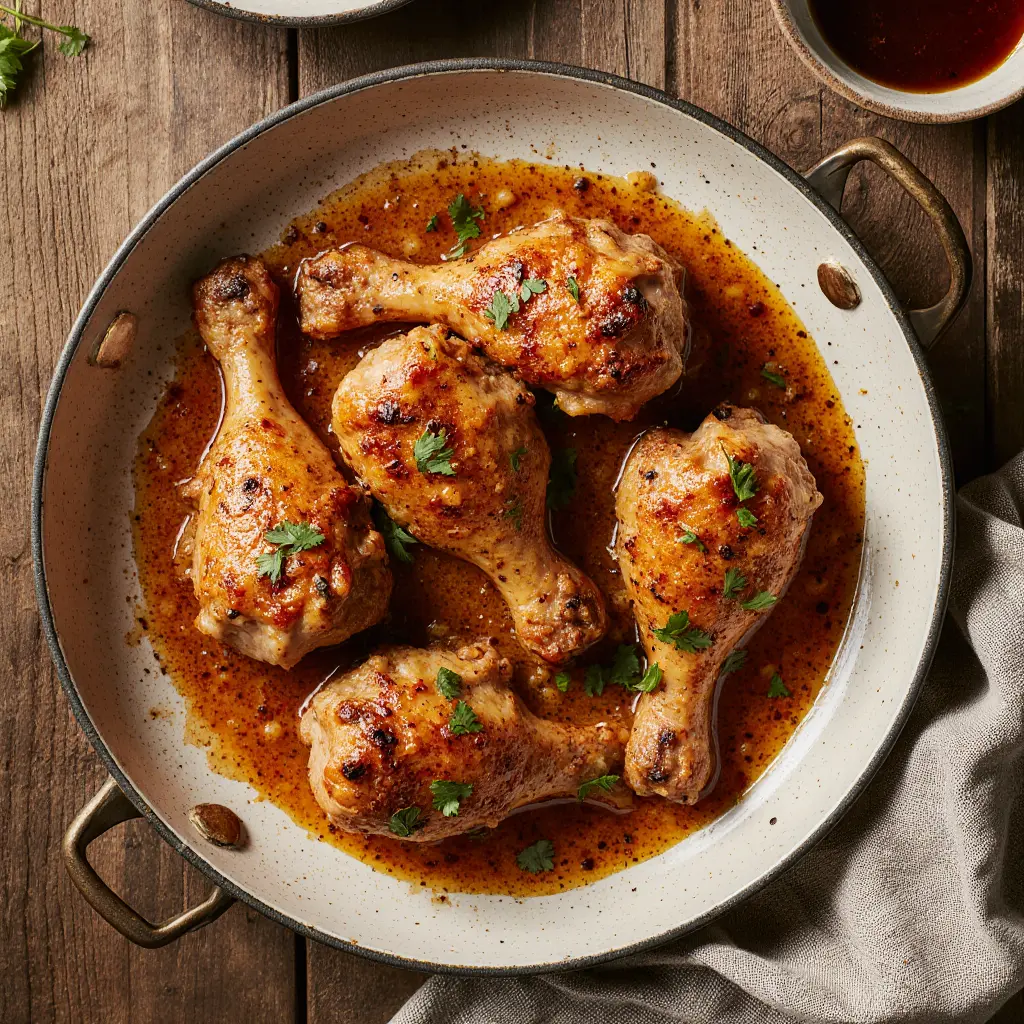
Drumstick Chicken Recipe: The Secret to the Crispiest, Juiciest Weeknight Hero
Ingredients
For the Chicken & Dry Rub:
- 8-10 chicken drumsticks about 3-3.5 lbs / {1.4-1.6 kg}
- 2 tablespoons olive oil 30 ml
- 1 ½ teaspoons kosher salt 7 g
- 1 teaspoon black pepper 2 g
- 1 ½ teaspoons garlic powder 4 g
- 1 ½ teaspoons paprika 4 g
- 1 teaspoon dried thyme or oregano 1 g
- ½ teaspoon onion powder 1 g
For the Optional Glaze:
- 2 tablespoons pure maple syrup or honey 30 ml
- 1 tablespoon soy sauce or tamari 15 ml
- 1 clove garlic minced
Instructions
- Step 1: Preparation: Preheat oven to 425°F (220°C). Line a large baking sheet with foil or parchment and place a wire rack on top. Pat the chicken drumsticks completely dry with paper towels.
- Step 2: Make the Dry Rub: In a small bowl, combine the salt, pepper, garlic powder, paprika, dried thyme, and onion powder.
- Step 3: Season the Chicken: Place dried drumsticks in a large bowl. Drizzle with olive oil and toss to coat evenly. Sprinkle the dry rub mixture over the chicken and use your hands to massage it onto every surface.
- Step 4: Arrange for Baking: Place the seasoned drumsticks on the prepared wire rack, ensuring they are not touching.
- Step 5: Initial Bake: Bake in the preheated oven for 35 minutes.
- Step 6: Prepare & Apply Glaze (Optional): While chicken bakes, whisk together maple syrup, soy sauce, and minced garlic. After 35 minutes, remove chicken from oven and brush each drumstick generously with the glaze.
- Step 7: Final Bake: Return the tray to the oven and bake for an additional 8-12 minutes, or until the skin is deeply golden, crisp, and the internal temperature reaches 175°F (80°C).
- Step 8: Rest and Serve: Let the chicken rest on the pan for 5 minutes before serving to allow juices to redistribute.