Homemade Kool-Aid Licorice Ropes Better Than Store Bought
Table of Contents
The first time I tried making Homemade Kool-Aid Licorice Ropes, my kitchen looked like a crime scene. Red powder everywhere, sticky syrup fingerprints on the cabinets, and me standing there with a candy thermometer I didn’t know how to read. I’d promised my niece we’d make these together, and honestly, I didn’t expect the process to be so… dramatic. But that’s the thing about candy-making — it’s equal parts science and chaos. These ropes taste like childhood in candy form, and once you get the hang of it, they’re surprisingly simple. If you’re looking for something fun to make with kids or just want to impress your friends with a homemade twist on a classic treat, this is it. And hey, if you’re in the mood for more sweet projects, check out some of my other Dessert ideas.
Why You’ll Love This Recipe
These Homemade Kool-Aid Licorice Ropes are like a hug in candy form. There’s something deeply comforting about pulling a stretchy rope of candy that you made yourself, knowing exactly what went into it. No weird preservatives, just sugar, gelatin, and that punchy Kool-Aid flavor that takes you straight back to summer afternoons.
Let’s talk money. A bag of name-brand licorice can cost a small fortune, especially if you’re buying the fancy flavors. Making your own? Pennies per rope. You probably have most of the ingredients in your pantry already, and a canister of Kool-Aid is cheaper than a cup of coffee.
Picky eaters? Sorted. Kids (and adults) who turn their noses up at store-bought candy will be lining up for these. You can customize the flavors to suit even the most stubborn taste buds — tropical punch for the adventurous, cherry for the classics, or even mix two flavors for a custom blend.
These ropes are perfect for meal prep… if you can resist eating them all in one go. Make a big batch on the weekend, store them in an airtight container, and you’ve got a sweet treat ready to go all week. They’re also great for lunchboxes, road trips, or just stashing in your bag for a midday pick-me-up.
Want to impress someone? Serve these at your next gathering. There’s something undeniably cool about saying, “Oh, I made these myself.” Plus, you can get creative with presentation — twist the ropes into little nests, package them in cute jars, or even use them as edible decorations on cakes.
The flavor and texture are downright addictive. Chewy, stretchy, and packed with that bold Kool-Aid punch, these ropes hit all the right notes. Once you start, it’s hard to stop — fair warning!
Ingredient Breakdown
Here’s what you’ll need for your Homemade Kool-Aid Licorice Ropes:
– 3 (.13 ounce) packages unsweetened Kool-Aid drink mix, any flavor
– 3 cups white sugar
– 1/2 teaspoon salt
– 1 cup light corn syrup
– 1 cup water
– 1 tablespoon black food coloring (optional, for classic licorice look)
– 1 teaspoon vanilla extract
– 1/4 cup all-purpose flour (for dusting)
The Kool-Aid is the star here — it gives the ropes their vibrant color and punchy flavor. I once tried using a generic drink mix to save a few cents, and let’s just say the flavor was… underwhelming. Stick with the name brand if you can; it really does make a difference.
Sugar is, well, sugar. You can’t skimp here — this is candy, after all. I’ve tried reducing the amount, thinking I’d make a “healthier” version, but the texture just wasn’t right. Candy is candy; embrace it.
Corn syrup is what gives these ropes their signature chew. Don’t try to substitute with honey or maple syrup — I learned the hard way that the texture goes all wrong. Trust me, corn syrup is your friend.
The black food coloring is totally optional. I love the classic licorice look, but if you’re making these with kids, let them pick their favorite Kool-Aid color and skip the extra dye. My niece once insisted on making “rainbow ropes,” and they were a huge hit.
Flour for dusting might seem odd, but it keeps the ropes from sticking to everything. I once forgot this step and ended up with a giant, sticky mess that took forever to clean up. Don’t be like me — flour is your friend.
Step-by-Step Instructions
Prep Your Space
Before you do anything, get your workspace ready. This is sticky business, and you don’t want to be scrambling for supplies mid-recipe. Line a few baking sheets with parchment paper and dust them lightly with flour. Trust me, you’ll thank yourself later. I once tried to wing it and ended up with ropes glued to my countertop — not fun.
Mix the Dry Ingredients
In a large, heavy-bottomed pot, whisk together the sugar, salt, and Kool-Aid powder. Make sure there are no lumps — you want everything evenly distributed. This is a good time to take a deep breath and get ready for the next step.
Add the Wet Ingredients
Pour in the corn syrup and water, then stir until everything is combined. At this point, the mixture will look like a murky, colorful soup. Don’t worry — that’s exactly what it’s supposed to look like.
Cook the Syrup
Place the pot over medium heat and bring the mixture to a boil, stirring constantly. This is where things can get a little wild. I once stepped away for “just a second” to answer the door, and came back to a bubbling volcano of hot sugar. Not recommended. Keep stirring, and use a candy thermometer to monitor the temperature. You’re aiming for 250°F (the hard-ball stage).
Add Flavor and Color
Once the syrup hits 250°F, remove it from the heat. Stir in the vanilla extract and black food coloring (if using). Be careful — the mixture is extremely hot and will steam up when you add the vanilla. I’ve burned my hand more than once being impatient here.
Pour and Cool
Quickly pour the hot syrup onto your prepared baking sheets. Don’t worry about making it perfect — you’re going to be pulling and shaping it anyway. Let it cool for a few minutes until it’s safe to handle but still warm and pliable.
Pull the Ropes
This is the fun part. Grease your hands lightly with cooking spray or butter, then start pulling the candy. Stretch it, fold it, and repeat. The more you pull, the lighter and chewier the ropes will become. My niece loves this step — she pretends she’s a candy-making superhero.
Shape and Cut
Once the candy is cool enough to hold its shape, roll it into long ropes and cut them into your desired length. I like to make them about 6 inches long, but you do you. Dust them lightly with flour to keep them from sticking together.
Let Them Set
Place the finished ropes on a clean piece of parchment and let them sit for at least an hour. This helps them firm up and makes them easier to store.
Store and Enjoy
Transfer your Homemade Kool-Aid Licorice Ropes to an airtight container. They’ll keep for up to two weeks — if they last that long. Fair warning: these disappear fast in my house.
What to Serve With
These Homemade Kool-Aid Licorice Ropes are a hit on their own, but if you want to get creative, here are a few ideas:
– Vanilla ice cream: The creamy, cold ice cream is the perfect contrast to the chewy, fruity ropes. It’s like a deconstructed sundae.
– Popcorn: Sweet and salty is always a winning combo. Serve the ropes alongside a big bowl of buttery popcorn for movie night.
– Fresh fruit: Balance out the sweetness with some sliced strawberries or pineapple. The bright, juicy flavors complement the candy perfectly.
– Hot cocoa: Dip the ropes into a mug of rich, hot cocoa for a cozy treat. The warmth softens the candy just enough to make it extra indulgent.
Pro Tips and Variations
Want to take your Homemade Kool-Aid Licorice Ropes to the next level? Here are a few tricks I’ve picked up along the way:
– Spice it up: Add a pinch of cayenne or cinnamon to the dry ingredients for a spicy kick. It sounds weird, but the heat plays surprisingly well with the sweetness.
– Vegetarian version: Swap the corn syrup for agave nectar and use agar-agar instead of gelatin. The texture will be a little different, but still delicious.
– Gluten-free: Make sure your Kool-Aid and other ingredients are certified gluten-free. Most are, but it’s always good to double-check.
– Guest upgrade: Twist two different colored ropes together for a fun, swirled effect. It looks impressive and tastes even better.
– Seasonal twist: Use seasonal Kool-Aid flavors (like lemonade in summer or fruit punch in winter) to match the occasion.
– Leftover reinvention: Chop up any leftover ropes and stir them into homemade ice cream or cookie dough for a fun surprise.
One last thing: reheating these ropes is a gamble. I once tried to soften some that had gone a little hard, and ended up with a sticky, inedible mess. Best to just enjoy them fresh!
Storing and Reheating
These Homemade Kool-Aid Licorice Ropes are best stored in an airtight container at room temperature. They’ll stay fresh for up to two weeks, though they rarely last that long in my house. If you want to keep them longer, you can freeze them for up to three months. Just make sure they’re well-wrapped to prevent freezer burn.
Reheating is tricky. If the ropes get too hard, you can try microwaving them for a few seconds, but be careful — they can go from perfect to rock-solid in no time. I once left a batch in the microwave for too long and ended up with a sad, melted puddle. Learn from my mistakes!
Customizations for Special Diets
If you’re cooking for someone with dietary restrictions, here are a few swaps you can try:
– Gluten-free: Use a gluten-free flour blend for dusting, and double-check that all your ingredients are certified gluten-free.
– Dairy-free: This recipe is naturally dairy-free, so no changes needed there.
– Low-fat: Candy isn’t exactly low-fat, but you can reduce the sugar slightly if you want. Just know the texture might change a bit.
– High-protein: Add a scoop of unflavored protein powder to the dry ingredients. It won’t make these a health food, but it’s a fun way to sneak in a little extra protein.
Common Mistakes to Avoid
I’ve made my fair share of mistakes making these Homemade Kool-Aid Licorice Ropes, so let me save you some trouble:
1. Not using a candy thermometer: Guessing the temperature is a recipe for disaster. Too low, and the ropes won’t set; too high, and they’ll be hard as rocks.
2. Skipping the flour dusting: Trust me, you do not want these ropes sticking to everything. Flour is your friend.
3. Pulling the candy too soon: If it’s too hot, you’ll burn your hands. If it’s too cool, it won’t stretch properly. Patience is key.
4. Overcrowding the pot: The syrup will bubble up as it cooks, so use a big enough pot to avoid a sticky mess.
5. Storing them while warm: If the ropes aren’t completely cool, they’ll sweat and get sticky in the container. Let them set fully before packing them away.
Frequently Asked Questions
Can I use a different type of drink mix?
Absolutely! You can use any unsweetened drink mix you like. Just keep in mind that the flavor and color will change accordingly. I once used a lemonade mix and ended up with bright yellow ropes that tasted like summer.
Why did my ropes turn out too hard?
This usually happens if the syrup is cooked to too high a temperature. Make sure your candy thermometer is accurate and keep a close eye on it as it cooks.
Can I make these without corn syrup?
Corn syrup is key to the chewy texture, but you can try substituting with agave nectar or golden syrup. Just know the texture might be a little different.
How do I keep the ropes from sticking together?
Dusting them with flour is the best way to prevent sticking. You can also wrap each rope individually in wax paper if you’re giving them as gifts.
Can I double the recipe?
Yes, but be careful — a bigger batch means a bigger pot and more careful temperature monitoring. I once tried to double the recipe in my regular-sized pot and ended up with syrup everywhere.
Troubleshooting
| Problem | Cause | Solution |
| :— | :— | :— |
| Ropes are too soft | Syrup didn’t reach hard-ball stage | Cook to 250°F next time |
| Ropes are too hard | Syrup cooked too long | Use a reliable candy thermometer |
| Ropes are sticky | Not enough flour dusting | Dust more generously |
| Ropes won’t stretch | Candy cooled too much | Warm slightly before pulling |
| Ropes are cloudy | Overworked the candy | Pull gently, don’t over-knead |
Final Thoughts
Making Homemade Kool-Aid Licorice Ropes is one of those kitchen adventures that’s equal parts messy and magical. The first time I made them, I was convinced I’d ruined the whole batch — but then I tasted one, and all was forgiven. There’s something so satisfying about creating a treat that’s nostalgic, customizable, and downright delicious. Plus, it’s a great way to get kids (or grown-ups) involved in the kitchen.
If you try this recipe, I’d love to hear how it goes! Did you stick with classic flavors, or get wild with your own creations? Drop a comment and let me know — I’m always looking for new ideas to try. And if you’re in the mood for more sweet inspiration, check out my other Dessert recipes. Happy candy-making!
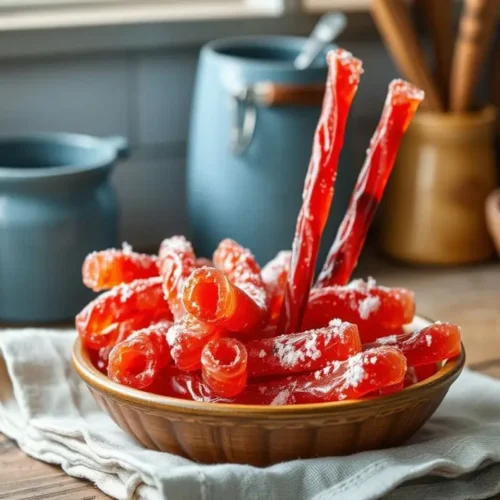
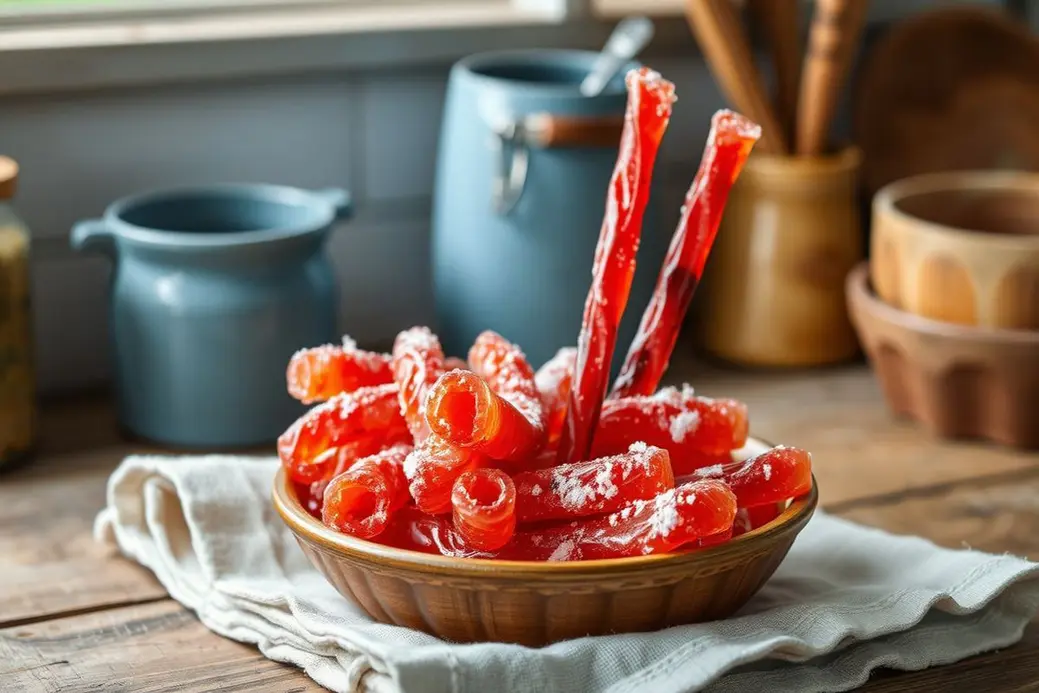
Sweet & Tangy Kool-Aid Licorice Ropes You Can Twist & Pull
Ingredients
- 1 cup granulated sugar — the cheap kind works fine, no need to get fancy
- ½ cup light corn syrup — this is what makes them chewy, not crunchy
- ¼ cup water — just from the tap, no need to measure with a fancy beaker
- 1 packet unsweetened Kool-Aid — any flavor, but cherry and grape are the classics
- 1 tbsp butter — for richness and to stop it sticking to everything
- ¼ tsp baking soda — this is the magic that makes the texture right
Instructions
- Line a baking sheet with parchment paper and grease it lightly — trust me, you’ll thank yourself later when you’re not chiselling candy off the tray.
- In a medium saucepan, stir together the sugar, corn syrup, and water. Clip a candy thermometer to the side — if you don’t have one, honestly, just keep an eye on it and don’t let it burn.
- Heat over medium, stirring until the sugar dissolves. Then stop stirring and let it bubble away until it hits 260°F (hard-ball stage). It’ll smell like molten lollipops and make you feel like a mad scientist.
- Remove from heat and quickly stir in the Kool-Aid powder, butter, and baking soda. It’ll foam up like a science fair volcano — that’s normal, just keep stirring until it’s smooth.
- Pour the hot mixture onto the prepared baking sheet. Let it cool for 5 minutes or until you can touch it without screaming.
- Grease your hands (I use butter, but oil works too) and start pulling and folding the candy. It’ll be hot, so be careful. Pull it into a rope, fold it, repeat — do this for about 5 minutes until it turns lighter and gets stretchy.
- Divide the candy into portions and roll each into a long rope about ½ inch thick. You can twist two colors together if you’re feeling fancy.
- Let the ropes cool completely on the parchment — they’ll firm up as they sit. Then cut into pieces or leave them long for maximum pulling satisfaction.