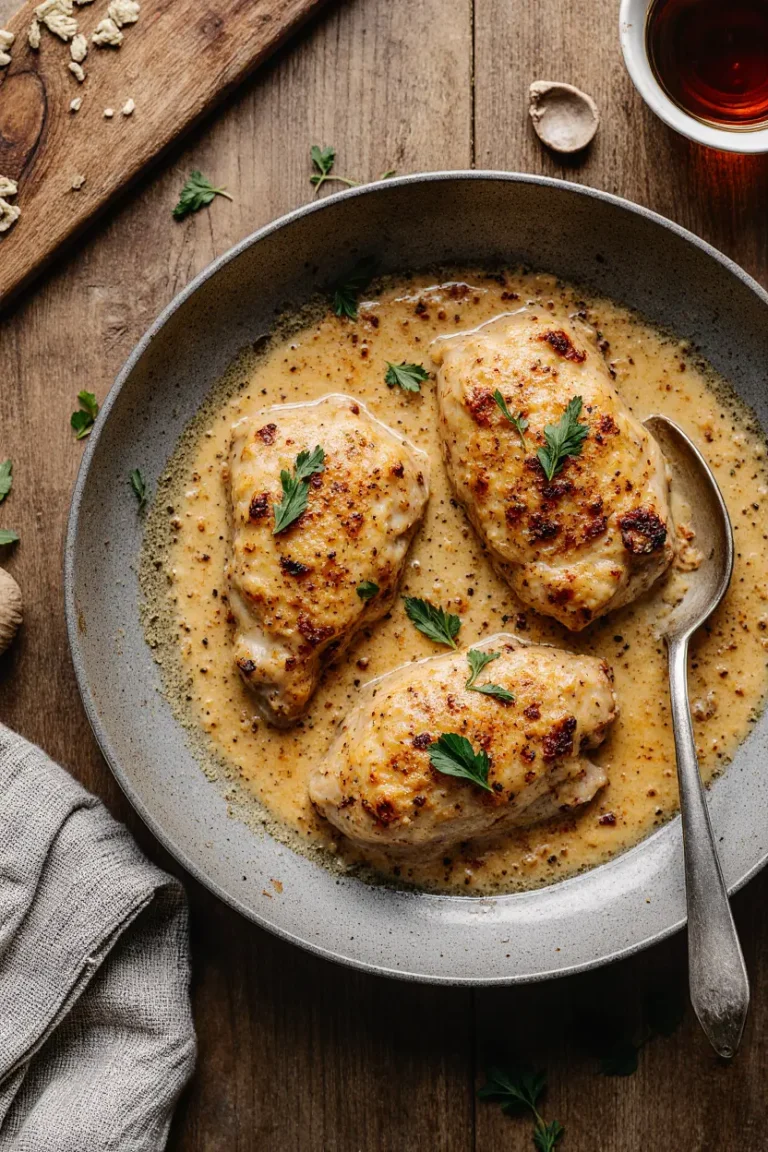
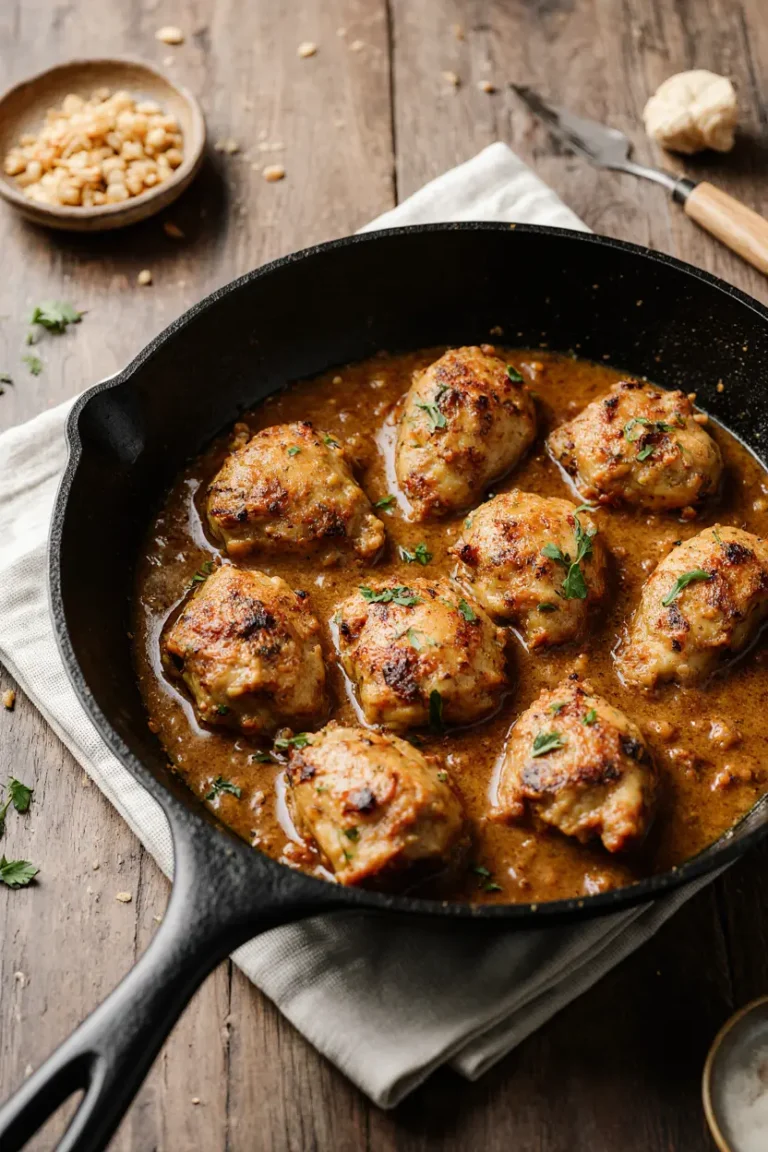
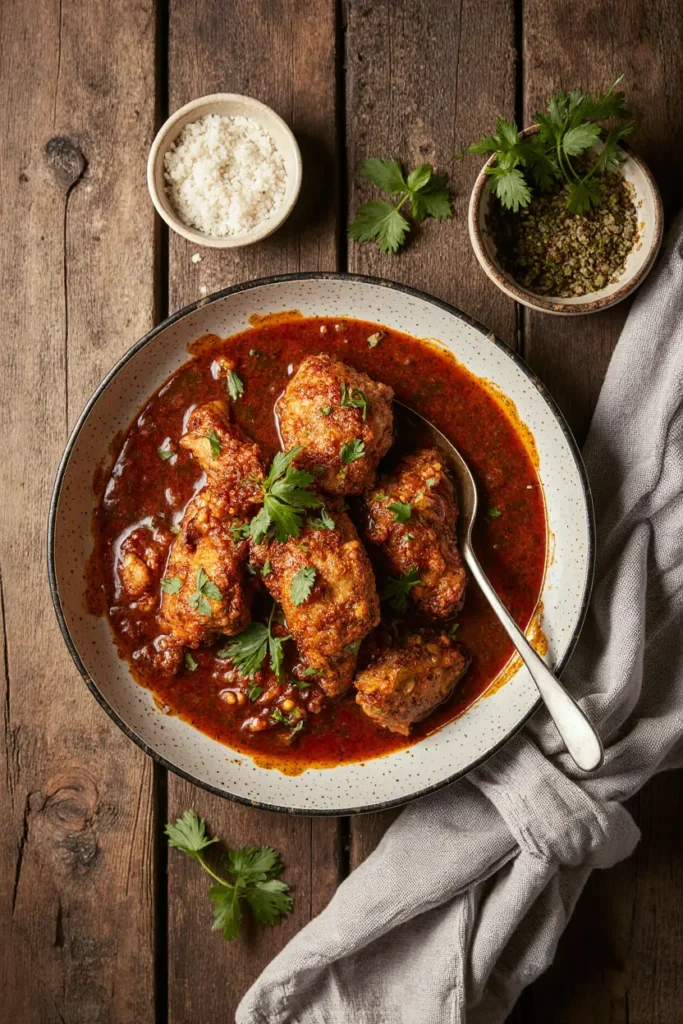
Crispy Chilli Chicken
Table of Contents
You know that feeling? The one where it’s Tuesday, you’re exhausted, and the only thing in the world that sounds good is that perfectly glossy, sweet-spicy, impossibly crispy chilli chicken from your favorite takeout spot. You stare at the menu on your phone, your finger hovering over the “order” button, while your wallet gives a quiet, sad whimper from the depths of your purse. I’ve been there more times than I care to admit.
But then, a few years back, after one too many orders that arrived soggy in a steamy box, I got stubborn. I was determined to crack the code. My first attempt was… a lesson in humility. Let’s just say I created more of a “Charred, Syrupy Chicken Nugget” situation. The sauce was a one-note sugar bomb, the chicken was tougher than my week, and my kitchen smelled like a caramelized disaster zone for days. But that failed attempt? It became my mission. I tweaked, I tasted, I burned a few more pieces to a crisp (oops), and honestly? I’m kinda glad those first tries were flops. Because what I landed on after all that chaos is something even better than takeout. It’s your version. It’s the version where you control the heat, the sweetness, and the crispiness. It’s the dish that makes you feel like a weeknight wizard, and it all comes together faster than a delivery driver can find your apartment.
This Crispy Chilli Chicken isn’t about perfection. It’s about that incredible crunch giving way to tender chicken, all wrapped in a sticky, vibrant, utterly moreish sauce that you’ll want to drink with a spoon. It’s about the messy, joyful process of making it, and the absolute triumph of sitting down to a plate of something you created that tastes like a celebration.
Why You’ll Love This Recipe
Let’s be real, you could just order in. But here’s why you’re going to want to grab that apron instead.
- The CRUNCH. Oh, The Crunch. This isn’t a soggy stir-fry. We double-coat the chicken and fry it (or air-fry it!) to create a craggy, golden, substantial crust that stands up to the sauce. That textural contrast is everything. It’s the satisfying bite that makes the dish.
- Your Wallet Will Thank You. The markup on takeout is real, y’all. For the price of one delivery order, you can make enough Crispy Chilli Chicken to feed a family, with leftovers for that glorious next-day fridge forage. It turns affordable chicken thighs into a restaurant-worthy experience.
- Sauce Sorcery You Control. Too sweet? Not a problem. Need more fire? You’re the boss. This sauce is a beautiful balance of tangy, sweet, and spicy, and you get to tweak it until it sings your song. Plus, you know exactly what’s in it—no mysterious “seasoning” packets here.
- It’s Faster Than You Think. Active cooking time is under 30 minutes. Seriously. The chicken fries up in batches while you whip up the sauce in the same pan. It’s a weeknight warrior disguised as a special treat.
- Leftovers Are a Gift. Honestly, I sometimes make extra just to have leftovers. The chicken loses a little crispness in the fridge, but the flavors meld and deepen overnight. It’s a fantastic next-day lunch that feels anything but sad.
Ingredients for Crispy Chilli Chicken
Don’t let the list intimidate you! A lot of this is pantry staples, and the magic is in how they come together.
For the Crispy Chicken:
- 1.5 lbs (about 700g) boneless, skinless chicken thighs, cut into 1-inch chunks. I swear by thighs here. Breast meat can dry out so fast, but thighs stay juicy and forgiving even if you overcook them a touch. Trust me on this.
- 1/2 cup cornstarch. This is our crispiness secret weapon. It creates that amazing, light crust.
- 1/2 cup all-purpose flour. Combined with the cornstarch for the perfect structure.
- 1 teaspoon baking powder. A tiny bit of science! This helps the coating puff up and get extra airy and crisp.
- 1 teaspoon salt
- 1/2 teaspoon black pepper
- 1 cup cold water. Cold is key! It makes for a lighter batter.
- Neutral oil for frying, like vegetable, canola, or peanut oil. You’ll need enough for about 1-1.5 inches in your pan or pot.
For The Legendary Sauce:
- 1/3 cup rice vinegar. The gentle tang is essential. In a pinch, white wine vinegar or apple cider vinegar works.
- 1/4 cup soy sauce. Use a standard one, not dark soy, for the right saltiness.
- 1/4 cup honey or maple syrup. Honey gives a floral note, maple is deeper. I use what I have. For unrefined sweetener options, you can explore a list of unrefined sweeteners.
- 3 tablespoons brown sugar. For that caramelized, sticky depth.
- 2-3 tablespoons sriracha or your favorite chili garlic sauce. Start with 2, you can always add more heat later! This is your spice dial.
- 4 cloves garlic, minced. More is always acceptable. I usually do 5. No regrets.
- 1 tablespoon freshly grated ginger. The jarred stuff works in a crisis, but fresh ginger makes it sing.
- 1 tablespoon tomato paste. Don’t skip this! It adds body and a rich, umami backbone to the sauce.
- 1 teaspoon sesame oil (toasted). For that nutty, fragrant finish.
- 1 tablespoon cornstarch mixed with 2 tablespoons cold water. This is our “slurry” to thicken the sauce into glossy perfection.
For Garnish & Serving:
- 3-4 green onions, thinly sliced.
- 1 tablespoon sesame seeds.
- Cooked jasmine or white rice, for serving. It’s the essential sauce vehicle.
Step-by-Step Instructions
Alright, friends. Aprons on, music up, let’s make a beautiful mess.
1. Chicken Prep & Batter Up.
Pat your chicken pieces really dry with paper towels. This is a non-negotiable step for maximum crisp. Throw them into a large bowl. In a separate, bigger bowl, whisk together the cornstarch, flour, baking powder, salt, and pepper. Pour in the cold water and whisk until you have a smooth, fairly thin batter—it should coat the back of a spoon but drip off easily. Dump the chicken into this batter and use your hands (the best tools!) to make sure every single piece is thoroughly coated. Let it sit while you heat the oil. This little rest helps the coating adhere.
2. Fry Time – Embrace the Splatter.
Heat about 1.5 inches of oil in a heavy-bottomed pot, Dutch oven, or deep skillet over medium-high heat. To test if it’s ready, drop a tiny bit of batter in. If it sizzles and floats to the top immediately, you’re golden (literally). Now, here’s the important part: don’t crowd the pan. I’m impatient, so I always crowd the pan, and then I’m mad that the chicken steamed instead of fried. Learn from my mistakes. Add the chicken pieces in batches, letting them cook for 3-4 minutes per side until they’re deeply golden brown and cooked through. Transfer them to a wire rack set over a baking sheet—this keeps them crispy on all sides. If you put them on paper towels, the bottom can get soggy from steam. Repeat until all the chicken is fried. Try not to eat more than, say, three pieces straight from the rack. It’s a test of willpower.
3. Whip Up the Sauce Wizardry.
Carefully pour out all but about 1 tablespoon of the hot oil from your pan. Return it to medium heat. Add the garlic and ginger and stir for just 30 seconds until fragrant—do NOT let it burn! Burnt garlic is bitter and sad. Then, add the tomato paste and stir it around for another 30 seconds. This “cooks out” the raw tomato taste. Now, pour in the rice vinegar, soy sauce, honey, brown sugar, and sriracha. Give it all a good whisk and let it come to a simmer.
4. The Glossy Finish.
Give your cornstarch slurry another quick stir (it settles) and then drizzle it into the simmering sauce while whisking constantly. Seriously, whisk like your dinner depends on it. You’ll see the sauce go from thin and watery to magically thick and glossy in about 60 seconds. Once it’s beautifully thickened, remove it from the heat and stir in that toasted sesame oil. That flavor is too good to cook off.
5. The Grand Finale.
Add all your crispy chicken pieces back into the pan with the sauce. Using a gentle folding motion, coat every piece in that glossy, incredible sauce. Be quick and confident—you want to preserve that crunch! Transfer everything to a serving platter and immediately shower it with the sliced green onions and sesame seeds.
What to Serve With Crispy Chilli Chicken
Obviously, a big fluffy mound of steamed jasmine rice is the classic and perfect partner. It soaks up the extra sauce gloriously. But to make it a full meal? Here are my go-tos:
- A Simple Cucumber Salad: Just thinly sliced cucumbers with a splash of rice vinegar, a pinch of sugar, and salt. The cool crunch is the perfect foil to the rich chicken.
- Steamed Broccoli or Bok Choy: Something green to balance the plate. Toss it right in the leftover sauce on your plate.
- For a real treat, make it part of a fakeout feast with some vegetable spring rolls or a simple egg drop soup from my appetizers-snacks category.
- Drinks: An ice-cold lager, a crisp white wine, or even a sparkling water with lime just cuts through everything perfectly.
Top Tips for Perfecting This Dish
I’ve made every mistake so you don’t have to. Here’s the gathered wisdom from my many kitchen experiments.
- Chicken Thighs Are Non-Negotiable. I said it before, I’ll say it again. They are forgiving, flavorful, and stay moist. If you must use breast, cut it slightly smaller and don’t overcook it.
- The Oil Temperature is Key. If the oil isn’t hot enough, the chicken will soak up oil and be greasy. Too hot, and the outside burns before the inside cooks. A cooking thermometer (around 350-375°F / 175-190°C) is a game-changer, but the sizzling batter droplet test works in a pinch.
- Don’t Sauce Until the End. Only toss the chicken in the sauce right before serving. If you let it sit, the crust will soften. We want that crunch!
- Sauce Too Thick? No panic. Just whisk in a tablespoon of warm water at a time until it’s back to a glossy, coating consistency.
- Sauce Too Thin? Mix another teaspoon of cornstarch with a tablespoon of cold water and whisk it into the simmering sauce. It’ll thicken right up.
Storing and Reheating Tips
Got leftovers? Lucky you.
- Storing: Let the chicken cool completely, then store it in an airtight container in the fridge. It’ll keep for 3-4 days. The sauce will thicken a lot when cold.
- Reheating for Best Results: The microwave is the enemy of crispiness. To reheat, spread the leftovers on a baking sheet and pop them in a 400°F (200°C) oven for 10-15 minutes, until hot and the coating has re-crisped a bit. You can also use an air fryer for about 5-7 minutes at 375°F (190°C). It won’t be quite as perfect as fresh, but it’s darn close.
- Freezing: You can freeze the cooked, sauced chicken for up to 2 months. Thaw in the fridge overnight and reheat in the oven as above. The texture of the coating will suffer a bit, but the flavor will still be great.
Frequently Asked Questions
Can I make this in an air fryer?
Absolutely! It’s my go-to for less mess. Toss the battered chicken in a little oil (a spray helps) and air fry at 400°F (200°C) for 12-15 minutes, shaking halfway through. Then toss in the sauce as usual.
My sauce didn’t thicken! What happened?
Your slurry might have been inactive (cornstarch loses potency over a very long time), or you didn’t bring the sauce to a full simmer before adding it. Simmering activates the cornstarch. If it’s not thickening, just mix a fresh slurry and try again.
Is this super spicy?
Not as written! With 2 tablespoons of sriracha, it’s a gentle, warming heat. The spice level is 100% customizable. Start with less, you can always add more at the end.
Customizations for Special Diets
- Gluten-Free: Use tamari instead of soy sauce and a 1-to-1 gluten-free flour blend in place of the all-purpose flour. For more on this, you can read about a gluten-free diet.
- Lower-Sugar: Reduce the honey and brown sugar by half, or use a sugar-free syrup alternative. The sauce will be less sticky but still flavorful.
- Lower-Fat: The air fryer method is your best friend here for the chicken. You can also reduce the oil in the sauce to just a quick spray. For broader dietary context, information on a low-fat diet is available.
Common Mistakes to Avoid
- Wet Chicken: Skipping the pat-dry step. Soggy chicken = a batter that won’t stick properly.
- Crowding the Pan: This drops the oil temperature and steams the chicken. Fry in batches, I promise it’s worth the extra few minutes.
- Burnt Garlic/Ginger: They cook in seconds. If they burn, they’ll make the whole sauce bitter. Start fresh if it happens—it’s okay!
- Adding the Slurry to Cold Liquid: The sauce must be simmering to activate the cornstarch and thicken properly.
Troubleshooting Table
| Problem | Likely Cause | How to Fix It |
|---|---|---|
| Soggy, greasy chicken | Oil temperature too low. | Ensure oil is hot enough before adding chicken (test with batter). Don’t overcrowd. |
| Chicken coating falling off | Batter was too thin or didn’t adhere. | Ensure batter is the consistency of heavy cream. Pat chicken VERY dry before battering. |
| Sauce is too thin | Slurry wasn’t activated or not enough cornstarch. | Ensure sauce is simmering when adding slurry. Mix a new slurry (1 tbsp cornstarch + 2 tbsp water) and whisk in. |
| Sauce is too thick | Too much cornstarch or over-thickened. | Whisk in warm water, a tablespoon at a time, until desired consistency. |
| Chicken is dry | Overcooked, especially if using breast meat. | Use thigh meat. Don’t overcook; fry just until golden and cooked through (165°F/74°C internal). |
Final Thoughts
At the end of the day, this Crispy Chilli Chicken recipe is more than just a list of ingredients and steps. It’s my kitchen victory lap after a bunch of comical failures. It’s the smell that fills my home and makes everyone wander in asking, “Is it ready yet?” It’s the confidence booster that tells you, yeah, you can make that restaurant favorite, and maybe even make it better.
It’s not about being a flawless chef. It’s about embracing the splatters, adjusting the heat to your taste, and maybe burning a single piece of garlic because you got distracted by a good song. That’s real cooking. And when you take that first bite—the crunch, the sauce, the warmth—you’ll know it was worth every second.
So tell me, when you make it… what’s your twist gonna be? A crazy extra garnish? A different chili? Be honest—how many pieces did you “test” straight from the frying rack?

Crispy Chilli Chicken
Ingredients
For the Crispy Chicken:
- 1.5 lbs boneless skinless chicken thighs, cut into 1-inch chunks {700g}
- 1/2 cup cornstarch {60g}
- 1/2 cup all-purpose flour {60g}
- 1 teaspoon baking powder {5g}
- 1 teaspoon salt {5g}
- 1/2 teaspoon black pepper {1g}
- 1 cup cold water {240ml}
- Neutral oil for frying e.g., vegetable, canola
For the Sauce:
- 1/3 cup rice vinegar {80ml}
- 1/4 cup soy sauce {60ml}
- 1/4 cup honey or maple syrup {60ml}
- 3 tablespoons brown sugar {40g}
- 2-3 tablespoons sriracha or chili garlic sauce {30-45ml}
- 4 cloves garlic minced
- 1 tablespoon freshly grated ginger {15g}
- 1 tablespoon tomato paste {15g}
- 1 teaspoon toasted sesame oil {5ml}
- 1 tablespoon cornstarch {8g} mixed with 2 tablespoons cold water {30ml}
For Garnish & Serving:
- 3-4 green onions thinly sliced
- 1 tablespoon sesame seeds {9g}
- Cooked jasmine or white rice for serving
Instructions
- Prepare the Chicken Batter: Pat the chicken pieces very dry with paper towels. In a large bowl, whisk together the cornstarch, flour, baking powder, salt, and pepper. Pour in the cold water and whisk until a smooth, thin batter forms. Add the dried chicken pieces to the batter and toss until every piece is thoroughly coated. Set aside.
- Fry the Chicken: Heat about 1.5 inches of oil in a heavy-bottomed pot or deep skillet over medium-high heat to 350-375°F (175-190°C). Working in batches to avoid crowding, carefully add the battered chicken pieces. Fry for 3-4 minutes per side until deeply golden brown and cooked through. Transfer the cooked chicken to a wire rack set over a baking sheet to drain and stay crispy. Repeat with remaining chicken.
- Make the Sauce: Carefully pour out all but 1 tablespoon of oil from the pan. Return the pan to medium heat. Add the minced garlic and grated ginger, stirring for 30 seconds until fragrant. Add the tomato paste and cook for another 30 seconds. Pour in the rice vinegar, soy sauce, honey, brown sugar, and sriracha. Whisk together and bring to a simmer.
- Thicken the Sauce: Give the cornstarch-and-water slurry a final stir and drizzle it into the simmering sauce while whisking constantly. Continue to whisk until the sauce thickens and becomes glossy, about 60 seconds. Remove from heat and stir in the toasted sesame oil.
- Combine and Serve: Add all the crispy chicken pieces to the pan with the sauce. Using a gentle folding motion, quickly coat every piece in the sauce. Transfer to a serving platter, garnish immediately with sliced green onions and sesame seeds, and serve hot with cooked rice.