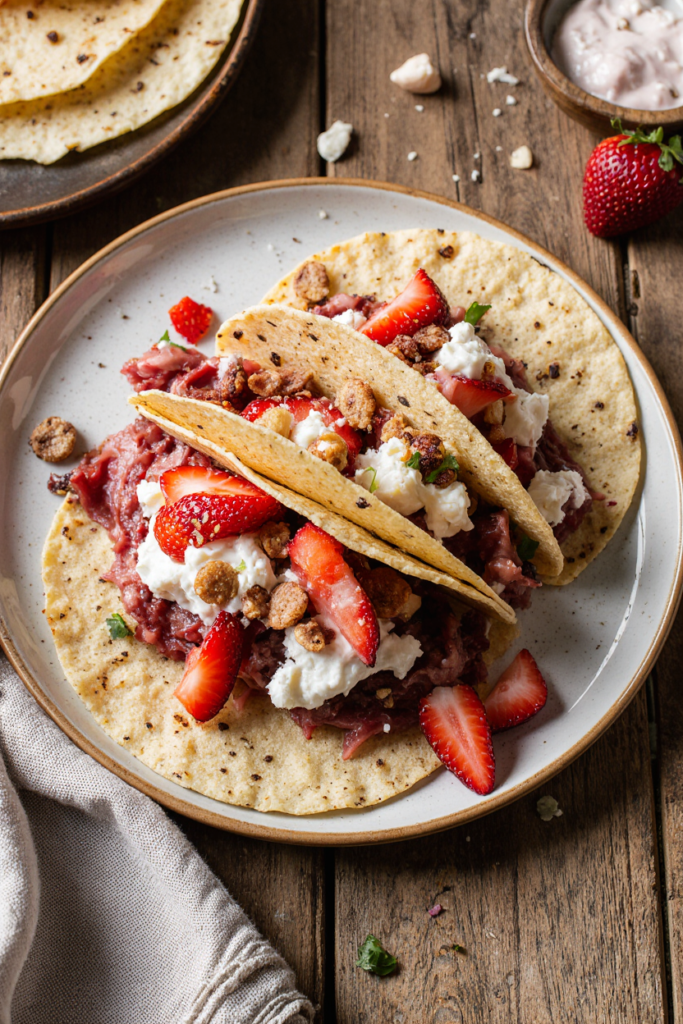
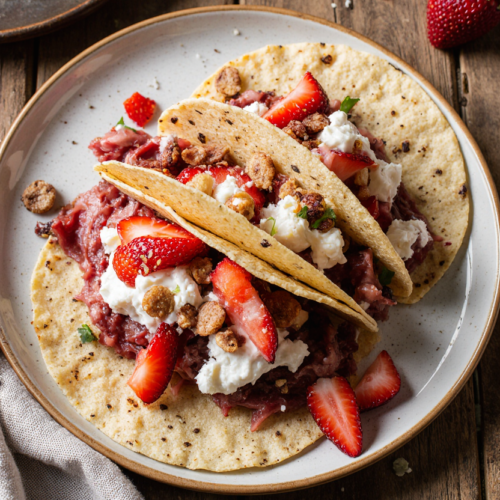
Strawberry Crunch Cheesecake Tacos
Table of Contents
It all started with a mess. A beautiful, glorious, crumb-covered mess. My kitchen counter looked like a bakery and a candy store had a fight, and the strawberry cheesecake filling won. I was just trying to make a simple dessert, you know? Something fun for a lazy Sunday with the kids. But then I saw these little street-taco-sized flour tortillas in the fridge, and a lightbulb went off—one of those dim, flickering, “this might be a disaster or it might be genius” kind of lightbulbs.
What if we could eat cheesecake… with our hands? Not a messy slice on a plate, but something you could grab, something portable, something that combined all my favorite textures? Creamy, cool filling. Sweet, juicy berries. And that iconic, nostalgic strawberry crunch topping from the ice cream bars I loved as a kid. The idea for Strawberry Crunch Cheesecake Tacos was born in a moment of pure, unadulterated hunger-driven creativity.
And let me tell you, the first try was… a learning experience. I overfilled one, and it did a spectacular faceplant onto my clean floor. Another one, I baked the shell a touch too long, and it decided to mimic a piece of abstract art more than a taco. But that third one? That third one was perfect. The shell was golden and just crisp enough to hold its shape, the filling was dreamy and light, and the crunch topping was pure magic. It was a dessert taco that somehow felt both wildly indulgent and weirdly playful. It’s the kind of recipe that makes you feel like a kitchen wizard without needing a single fancy skill. It’s quick to throw together, an absolute hit with every single person (kids, neighbors, that one friend who “doesn’t really like sweets” – they all cave), and it’s so much more fun than a plain old piece of pie.
Why You’ll Love This Recipe
Let’s be real, sometimes you need a dessert that’s more than just tasty—it needs to be an experience. This is that dessert.
- It’s Pure, Unapologetic Joy in Edible Form. There’s something inherently fun about food you can hold. These tacos break all the stuffy dessert rules. They’re meant to be picked up, they’re meant to get a little messy, and they’re guaranteed to make people smile. The combination of the crisp shell, the velvety filling, and the sandy-sweet crunch is a textural party in your mouth.
- Your Wallet Will Thank You. Think about the cost of a fancy dessert at a restaurant or even a slice of cheesecake at a specialty bakery. This recipe uses simple, accessible ingredients you can find anywhere. A block of cream cheese, some berries, basic pantry staples—that’s it. You can create a whole platter of these stunning, impressive desserts for the price of two slices elsewhere. It’s a total win.
- The Toppings Are Your Playground. The classic strawberry crunch is non-negotiable for me (it’s the soul of the dish!), but after that, the world is your oyster. Fresh strawberry slices, a drizzle of melted strawberry jam, a dollop of whipped cream, a sprinkle of mini chocolate chips, or even a zigzag of chocolate sauce. You can make each taco a little different, which is perfect for a gathering where everyone has their own favorite thing.
Ingredients for Strawberry Crunch Cheesecake Tacos
Don’t let the list fool you—this is mostly assembly magic. I’ve broken it down into the three main components so it’s easy to follow.
For the Baked Taco Shells:
- 8 small (6-inch) soft flour tortillas: The street-taco size is crucial here. The larger ones will flop and be too cumbersome.
- 3 tablespoons melted butter: For brushing. This gives them that gorgeous golden color and helps them crisp up.
- 3 tablespoons granulated sugar: Mixed with a little cinnamon (optional), this creates a sweet, sparkly crust on the shells.
For the Strawberry Crunch Topping:
- 1 cup (about 18) golden vanilla sandwich cookies: Like the classic ones with the vanilla filling. This is the base of our “crunch.”
- ⅓ cup freeze-dried strawberries: This is the secret weapon! They pack an insane punch of pure strawberry flavor and beautiful red color without adding any moisture.
- 2 tablespoons granulated sugar: Just a bit to sweeten the sand.
- 3 tablespoons melted butter: This binds the crumbs together to create those delicious, clumpy bits.
For the No-Bake Cheesecake Filling:
- 8 ounces full-fat brick cream cheese, softened: This is non-negotiable. Use the full-fat, brick-style. The spreadable kind in a tub will make your filling runny. Let it sit on the counter for a good hour until it’s super soft.
- 1 cup cold heavy whipping cream: For whipping into stiff, luxurious peaks.
- ⅔ cup powdered sugar: Dissolves beautifully and sweetens the filling without grittiness.
- 1 teaspoon pure vanilla extract: The good stuff makes a difference here.
- A tiny pinch of fine sea salt: Just a smidge to balance all the sweetness and make the flavors pop.
For Serving & Garnish:
- 1 cup fresh strawberries, hulled and diced: For that juicy, fresh burst.
- Optional extras: Extra whipped cream, a drizzle of warm strawberry jam, or a dusting of powdered sugar.
Step-by-Step Instructions
Alright, let’s get into it. I’ll walk you through exactly how I do it, mistakes and all, so yours turn out perfect.
Part 1: Make the Magical Crunch Topping
This is the first thing I do because it’s easy and it lets the flavors hang out. In a food processor, pulse the sandwich cookies and the freeze-dried strawberries together until they become fine crumbs. You’ll still see little red speckles—that’s good! Dump these crumbs into a bowl and stir in the granulated sugar. Now, pour the melted butter over top and use a fork to mix it all together until it looks like wet sand and starts to clump together when you squeeze it. Set this aside. Honestly, I have to stop myself from eating this by the spoonful.
Part 2: Shape and Bake the Taco Shells
Preheat your oven to 375°F (190°C). This is where my first “oops” happened, so pay attention. You need to create a little rack for the tortillas to drape over so they form that perfect taco shape. I use the oven rack itself, but I position a baking sheet on the rack below to catch any drips. Brush both sides of a tortilla lightly with the melted butter, then sprinkle both sides with the cinnamon sugar (if using). Drape the tortilla over two bars of the oven rack, so the middle sags down into a U-shape. Repeat with as many as you can fit without them touching. They will puff up a little!
Bake for 8-10 minutes. Keep a VERY close eye on them after the 7-minute mark. They go from perfect golden to “oh no” very quickly. You want them lightly browned and crisp. Carefully remove them (they’re hot!) and let them cool completely on a wire rack. They’ll firm up as they cool. If you try to fill them warm, they’ll get soggy. I have the patience of a gnat, so I usually turn a fan on them to speed this up.
Part 3: Whip Up the Dreamy Filling
While the shells cool, make the filling. In a large bowl, beat the softened cream cheese with an electric mixer until it’s completely smooth and no lumps remain. This is key—lumpy cream cheese is the enemy. Scrape down the sides of the bowl. Add the powdered sugar, vanilla, and that tiny pinch of salt. Beat again until it’s silky.
Now, in a separate, very clean bowl (I even chill my bowl and beaters sometimes), beat the cold heavy cream on medium-high speed until stiff peaks form. This means when you lift the beaters, the peak stands straight up and doesn’t flop over. Don’t walk away and let it turn to butter! I’ve done that. It’s sad.
Gently fold about one-third of the whipped cream into the cream cheese mixture to lighten it. Then, carefully fold in the rest until no white streaks remain. Be gentle! You want to keep all that air you whipped in. Cover this and pop it in the fridge to chill and firm up a bit while you prep everything else.
Part 4: The Grand Assembly
This is the fun part. Take a cooled, crisp taco shell. Spoon or pipe a generous amount of the cheesecake filling into the bottom. Don’t overfill it like I did that first time—leave a little lip at the top. Top the filling with a spoonful of the fresh diced strawberries. Now, generously sprinkle (or, let’s be honest, pile on) that strawberry crunch topping over everything. The crumbs will stick to the filling and the berries, creating that iconic look.
Repeat with all the shells. I like to do this on a big platter. They are best served immediately, while the shell is still crisp against the cool, creamy filling.
What to Serve With Strawberry Crunch Cheesecake Tacos
These tacos are a star all on their own, but if you’re building a whole dessert spread or just want the perfect sip alongside, here are a few ideas:
- A Cold Glass of Milk: It’s a classic for a reason. The creaminess cuts the sweetness perfectly.
- Sparkling Beverage: A glass of sparkling water with a lemon twist, or a fruity sparkling soda, adds a nice bubbly contrast.
- Coffee or Tea: A hot cup of coffee or a fruity herbal tea makes this feel like a sophisticated dessert cafe experience at home.
- On a Dessert Board: Surround them with other handheld treats like mini cookies, chocolate-dipped fruits, and nuts for a truly epic sweet finale to any meal. If you love fun, shareable sweet bites, you might enjoy browsing other ideas in my desserts category.
Top Tips for Perfecting Strawberry Crunch Cheesecake Tacos
I’ve made these more times than I can count, and here’s what I’ve learned the hard way so you don’t have to.
- The Tortilla Matters. Size is everything. The 6-inch “street taco” flour tortillas are the ideal vessel. Larger ones become floppy and awkward to eat.
- Patience with the Cream Cheese. Seriously, let it get truly soft. If it’s still cool in the middle, you’ll get little lumps in your filling that no amount of mixing will fix. I take mine out when I start prepping everything else.
- Watch Those Shells Like a Hawk. Ovens vary wildly. Start checking at 7 minutes. They should be just set and lightly golden. They’ll crisp up more as they cool. Overbaked shells taste bitter and can shatter.
- Freeze-Dried Strawberries Are Non-Negotiable. You can find them in the snack aisle or with the dried fruits. They provide intense flavor and color without making the topping soggy. Don’t try to substitute with fresh or frozen.
- Assemble Just Before Serving. For the best texture contrast, assemble these no more than 30 minutes before you plan to eat them. You can prep all the components ahead of time (shells in an airtight container, filling in the fridge, topping in a bag), but put them together at the last minute.
Storing and Reheating Tips
This is a “fresh is best” situation, but here’s how to handle leftovers (if you have any!).
- Storage: Store any assembled leftovers in a single layer in an airtight container in the refrigerator for up to 1 day. The shells will lose their crispness and become softer, more like a crepe, but they’ll still taste delicious.
- Do Not Freeze Assembled Tacos. The filling does not freeze well and will become grainy and separate when thawed.
- Make-Ahead Strategy: You can absolutely bake the shells and store them in an airtight container at room temperature for 2 days. The crunch topping can be made and stored in a sealed bag at room temperature for a week. The filling can be made and kept covered in the fridge for 2 days. Then, just assemble when ready.
Frequently Asked Questions
Can I make these gluten-free?
Absolutely! Use your favorite gluten-free small flour tortillas and gluten-free vanilla sandwich cookies. The rest of the recipe is naturally gluten-free.
My filling is too runny. What happened?
Two likely culprits: your cream cheese wasn’t fully softened, or you under-whipped the heavy cream. Make sure the cream is whipped to truly stiff peaks. If it’s still soft, you can pop the whole bowl of filling in the fridge for 30 minutes to firm up before piping.
I can’t find freeze-dried strawberries. What can I use?
This is the hardest ingredient to substitute. In a pinch, you could use 2-3 tablespoons of strawberry powder (made from grinding up strawberry-flavored gelatin dessert mix), but the flavor will be different. It’s worth seeking out the freeze-dried ones!
Can I use a different fruit?
For sure! The concept is versatile. Try using freeze-dried raspberries or mangoes in the crunch, and match the fresh fruit on top. The cheesecake filling is a perfect neutral canvas.
Customizations for Special Diets
- Lighter Version: For a lower-fat version, you can use a lighter cream cheese alternative and swap the heavy cream for a well-chilled canned coconut cream (the solid part). The texture will be slightly different but still tasty. For more on lower-fat approaches, you can read about general principles of a low-fat diet.
- Refined Sugar Option: The powdered sugar in the filling can be replaced with a finely ground, unrefined sweetener. The sugar in the crunch topping and on the shells can also be swapped for your preferred granulated alternative. Explore a list of unrefined sweeteners for ideas.
Common Mistakes to Avoid
- Overfilling the Shell: It’s tempting, but it leads to structural failure and a big mess. Show some restraint.
- Using Spreadable Cream Cheese: The additives that make it spreadable straight from the fridge will ruin the structure of your filling. Brick-style only.
- Baking Shells on a Flat Pan: If you just lay them flat on a baking sheet, you’ll get crispy bowls, not taco shapes. You need that drape over the oven rack or a makeshift taco rack.
- Adding Fresh Fruit to the Crunch Topping: This will introduce moisture and make the whole topping soggy and clumpy. Keep the fresh fruit as a separate layer.
Troubleshooting Table
| Problem | Likely Cause | How to Fix It Next Time |
|---|---|---|
| Soggy Taco Shells | Filled while still warm, or assembled too far in advance. | Let shells cool completely. Assemble just before serving. |
| Lumpy Cheesecake Filling | Cream cheese was not fully softened. | Let cream cheese sit at room temperature for 60-90 minutes until very soft. |
| Runny Cheesecake Filling | Heavy cream was not whipped to stiff peaks, or a low-fat ingredient was used. | Whip cream until peaks stand straight up. Use full-fat ingredients. |
| Crunch Topping is Not “Crunchy” | Not baked enough, or butter wasn’t fully incorporated. | Bake shells until golden. Mix melted butter thoroughly into crumb mixture. |
| Shells Burned Quickly | Oven too hot, or tortillas too thin. | Check oven temperature with a thermometer. Start checking shells at 6-7 minutes. |
Final Thoughts
This recipe, for me, is more than just a clever dessert. It’s a reminder that the best things in the kitchen often come from a little chaos, a willingness to play, and the acceptance of a few floor-bound casualties along the way. It’s not about perfection. It’s about the laughter when someone gets crumbs everywhere, the “oohs” when you bring out the platter, and the simple joy of eating something truly delightful with your hands.
These Strawberry Crunch Cheesecake Tacos have become my go-to for potlucks, birthday parties, and those “I need something sweet NOW” Friday nights. They feel special without being fussy. So, I invite you to embrace the mess, sprinkle that crunchy topping with abandon, and take a big bite. How would you make these your own? Would you add a drizzle of chocolate? A sprinkle of nuts? Be honest—how many spoonfuls of that crunch topping did you eat before it even made it to the tacos? I won’t tell.
Strawberry Crunch Cheesecake Tacos
Ingredients
For the Baked Taco Shells:
- 8 small 6-inch soft flour tortillas
- 3 tablespoons 43 grams melted butter
- 3 tablespoons 38 grams granulated sugar
For the Strawberry Crunch Topping:
- 1 cup about 18 cookies golden vanilla sandwich cookies {about 135 grams}
- ⅓ cup freeze-dried strawberries {about 10 grams}
- 2 tablespoons 25 grams granulated sugar
- 3 tablespoons 43 grams melted butter
For the No-Bake Cheesecake Filling:
- 8 ounces full-fat brick cream cheese softened {227 grams}
- 1 cup cold heavy whipping cream {240 ml}
- ⅔ cup powdered sugar {80 grams}
- 1 teaspoon pure vanilla extract {5 ml}
- 1 tiny pinch fine sea salt
For Serving & Garnish:
- 1 cup fresh strawberries hulled and diced {150 grams}
- Optional extras: extra whipped cream warm strawberry jam, powdered sugar
Instructions
Make the Crunch Topping:
- In a food processor, pulse the sandwich cookies and freeze-dried strawberries together into fine crumbs with visible red speckles.
- Transfer the crumb mixture to a bowl. Stir in the 2 tablespoons of granulated sugar.
- Pour the 3 tablespoons of melted butter over the crumbs. Use a fork to mix until the mixture resembles wet sand and clumps together when squeezed. Set aside.
Shape and Bake the Taco Shells:
- Preheat oven to 375°F (190°C). Place a baking sheet on a lower oven rack to catch drips.
- Lightly brush both sides of a tortilla with the 3 tablespoons of melted butter, then sprinkle both sides with the 3 tablespoons of granulated sugar.
- Drape the tortilla over two bars of the upper oven rack so it forms a U-shape. Repeat with remaining tortillas, ensuring they don’t touch.
- Bake for 8-10 minutes, watching closely after 7 minutes, until lightly golden and crisp.
- Carefully remove the shells and let them cool completely on a wire rack.
Make the Cheesecake Filling:
- In a large bowl, beat the softened cream cheese with an electric mixer until completely smooth and lump-free.
- Add the powdered sugar, vanilla extract, and salt. Beat again until smooth and silky.
- In a separate, clean bowl, beat the cold heavy whipping cream on medium-high speed until stiff peaks form.
- Gently fold about one-third of the whipped cream into the cream cheese mixture to lighten it. Then, carefully fold in the remaining whipped cream until no white streaks remain.
- Cover and refrigerate the filling while the shells cool.
Assemble the Tacos:
- Once the shells are completely cool, spoon or pipe a generous amount of cheesecake filling into each one, being careful not to overfill.
- Top the filling in each shell with a spoonful of diced fresh strawberries.
- Generously sprinkle the prepared strawberry crunch topping over the strawberries and filling.
- Serve immediately for the best texture contrast.